Sys_Gracia's Articles

1. The basic role of the Belt

First, pressurize.Apply a certain pressure on the muscles to regulate the balance of exercise.To a certain extent, strengthen muscle strength and reduce swelling.The muscles are stimulated during exercise, the metabolism is accelerated, and the amount of water in the muscle cells increases, which causes the cells to have a swelling feeling. Appropriate pressure appropriately can help the exercise easier and powerful.

Second, support.The harder waist custard can provide a certain support during the movement, hold the bending waist, reduce the strength of its muscles, and protect the waist of not sprained or sore.Some functional waist guards are attached to the back of the back of the waist, which can effectively provide greater support to avoid accidental damage. The rear of this waistband is generally higher.

Third, heat preservation.The softer and comfortable waist of the double or multi -layer material has a strong insulation function.Athletes often wear less in sports, while waist heat dissipation, easy to get cold, causing people to be sour, spasm or causing discomfort in the stomach.The waist protection of the insulation performance can effectively maintain the waist temperature, accelerate blood circulation, and prevent some discomfort in the cold and stomach.

Fourth, body shaping.Strengthen cell metabolism, burn fat, regulate looseness, and apply appropriate pressure to help lose weight.In the movement related to the waist, pressing the waist -absorbing waist -absorbing waist can speed up the decomposition of fat.

Second, the choice skills of the Belt

1, Is the protection purpose of the lumbar or hip? The former needs to buy high waist guards, and the latter needs to buy low waist guards.Patients with lumbar disc herniation need to buy high waist care, and postpartum women often need to protect pelvis. At this time, low waist care is better.

2, Whether it has orthopedic function What's more? For patients with lumbar discomfort, steel bars or resin plates often need to be added after the waist protection to fix the body shape to reduce bending and relieve pain.However, this board must be strong and flexible! In this sense, high -quality resin stripes have better effects than ordinary steel bars because of their flexibility and both flexibility.Only when you are flexible and both, can you feel pain or twitching when you correct your waist and back and restore the tall posture.

3, What is the sweaty of ventilation? This is very important! Most people need waist protection, not only for winter, but also for summer. At this time, if the waist guards cannot be sweaty, then wearing it will become a kind of suffering.If the waist protection is a mesh structure, this problem can be solved.

4, Is there anti -slip protection to prevent the shift of protective gear? After wearing a bad waist, the movement began to shift and skewed it with a little exercise, and pulling it on the body was uncomfortable.

5. Whether the material is lightweight and thin What's more? Social pursuing fashion, no one is willing to be heavy and thick protective gear, which affects dressing.Only the Slim and close waist can show a beautiful figure!

6. Is the lines of the outer contour of the waist guarding reasonable? It is often inconvenient to sit and lie on the waist guards.Only the line shape that meets the body and movement habits can fit the body, and can be flexible when bending and turning and exercising.

7. Is it easy to deduct?

8. Whether to have attachment functions What's more? If you have a small bag that can be loaded in the heating tablet, if so, it can be used in winter and it can be cleared in summer.

9. Is it laborious? This is still important for people of the previous age.Some good waistbands use the principle of pulleys, and they can easily bind them with less force to ensure that they will not be too tingling while fixed.In summary, you must consider your own characteristics and needs when purchasing the waist protection, and choose the type of intimate stretching and useful use.

Disclaimer: The above method stems from the index of the program system or the sharing of netizens. It is for your reference only and does not represent the research perspective of this website. It proves that it is valid. Please pay attention to the authenticity and authority of the source of the content of the content.Apply to delete & gt; & gt; error correction & gt; & gt;
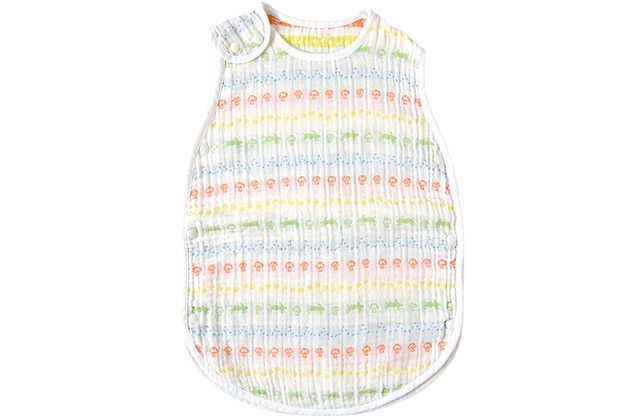

How to make a Baby sleeping bag

Method one

1. Prepare the tools and materials, including fabrics, zippers, needles, quilts, one quilt, buttons, two capsules suitable for infants.

2. Fold the thin quilt and cover the whole body of the baby.

3. Add the long zipper of the upper clothes to the two sides of the quilt, and then add the shoulders on the two shoulders, and fix it with buttons and quilts.

4. Connect the pillow to prevent the baby from losing the pillow when he sleeps. Such a simple Baby sleeping bag is ready.

Method two

1. Prepare a cotton vest. It can also be new. It is also okay for your own old clothes to transform, but you need to choose a loose vest. It is best not to be too big.

2. Prepare a flat loose band, narrow, not too hard.

3. Put the baby's wrist with thickness and thinness into the rubber band by pressing the sleeves of the vest. It should be slightly wider, because the clothes wrinkled will make the cuffs smaller.

4, the same is true to put on the collar, but do not wear the whole circle, because the clothes wrinkles are uncomfortable behind the baby's neck, so stay behind the neck, probably start from the shoulders for half a circle.

5. According to personal needs, the bottom edge can be installed or not. If the baby is big, it will be done from below, and the Baby sleeping bag will be ready.

What should I pay attention to when making a Baby sleeping bag

1. In the process of making baby sleeping bags, you should often observe whether it is appropriate, adjust it in time according to the specific situation of the baby, do not be troublesome, and the thickness of the sleeping bag with quilts, towels, blankets, etc.Don't be careless.

2. Adjust the production materials according to the weather, and modify the design plan according to the baby's habit. Generally, three Sleeping bags can be used for many years. With the baby grow up quickly, the weather and the temperature in the house are ever -changing.Don't worry about it, just replace the tied single towel.

3. It will be better to make an additional sleeping bag. The extended sleeping bag can make appropriate adjustments according to the baby's head, which is more comfortable.

4. The production materials of baby sleeping bags include down, silk, cotton, chemical fiber cotton, etc. Among them, cotton has a good hygroscopic absorption, which can be used in the four seasons throughout the year, and it is also suitable for the growth and development of infants and young children.

Disclaimer: The above method stems from the index of the program system or the sharing of netizens. It is for your reference only and does not represent the research perspective of this website. It proves that it is valid. Please pay attention to the authenticity and authority of the source of the content of the content.Apply to delete & gt; & gt; error correction & gt; & gt;

How to make a Telescope by yourself

The Telescope is actually a Tool that looks closer to the distant objects.In order to realize this function, there is a device (objective mirror, also called a main mirror) on the Telescope to collect the light from the distant objects, and pass the light (image) to the focus of another device (eyepiece lens).Eliminate the image and pass to your eyes.According to the following steps, you can make a simple Telescope at home.

Simple self -made Telescope material

Two magnifying glasses -about 2.5--3 cm in diameter (if one of them is larger than the other, the effect will be better), a paper Tube -roll into a Tube with paper towels or gifts (a little growing a fewIt will be better), tape, scissors, a straight ruler, code ruler or tape measure, paper with content -newspapers or magazines.

Making steps of handmade Telescope

Take out two magnifying glass and a printed article.

Put a magnifying glass (the big one) between you and paper.The image on the article will look vague.

Put another magnifying glass between your eyes and the first magnifying glass.

Move the second glass back and forth until the printing content looks very clear.You will notice that the article looks bigger and is inverted.

Please help me to measure the distance between the two magnitude magnifying glasses and record it.

Cut a groove at about 2.5 cm in the front end of the paper Tube near the front end.Don't cut the roller.This slot can accommodate the larger magnifying glass.

Cut another groove on the paper Tube. The distance between this slot and the first slot is equal to the distance recorded by your friends.This is where the second magnifying glass is placed.

Put the two magnifying glass on the corresponding groove (large on the front, the small on the back), and fix them with tape.

Leave a rolling of about 1-2 cm behind the smaller magnifying glass and cut off the excess roll.

Use this Telescope to look at the paper printed with content to check whether it has made it successfully.You may have to spend some energy to determine the accurate distance between the two lenses, so that the image can focus.

You have made a simple refraction Telescope!With this Telescope, you can use it to observe the moon, some stars and things on the earth (such as birds).

The above is the method of making ordinary Telescopes. Let's take a look at how to make more professional natural Telescope.

Detailed explanation of astronomical Telescope DIY steps

Here I introduce to you the Cairple -style refracted Telescope that is easy to find. This type of Telescope is also the easiest to make. It does not have too high requirements. The field of view is large.In this society, it is relatively easy to find. Unlike the reflex, the concave mirror is not purchased from the manufacturer, it can only be made through its own hard grinding, and it may not be successful at one time.Our Telescope belongs to the entry level. It cannot be compared with those high -end, but it can also meet general observation requirements.It is still helpful for improving interest and knowledge of astronomy.

The first is the magnification rate of the Telescope, because it is an entry -level, in order to ensure the picture quality and clarity (that is, the resolution), we should not pursue the amplification multiples.Observation to the object is the humiliation of vision.Here I introduce to you a Telescope of about 30 times. It can clearly see the ring mountain on the moon. The largest planet Jupiter looks like a small disc. When the observation conditions are good, you can see it above it.The large erythema, as for Saturn halo, if your lens quality and handmade are made well enough, when the Saturn is large in the clear night sky, you can barely see something unusual around it, yes, that is, it is it itThe halo.

Astronomical Telescope production material

One piece of telephoto mirror, short-focus flat and convex (dual convex) lens 1-4 pieces, paper Tube (or rolling with paper by itself), glue, etc.

Astronomical Telescope mirror Making

First, the first is a material mirror. The caliber is about 50-80 cm at a caliber of about 5 cm. It mainly depends on what kind of focal length you can find. Theoretically, the larger the caliber, the longer the more focal length.It is better. This kind of lens is more difficult to find now. Unlike before, there are mail order kits. A lens with a caliber of 10 cm with a caliber of 10 cm is not a very difficult thing.It can be searched on the online shopping. Finding a lens with a focal length of 80 cm should not be difficult. My Telescope uses a flat convex lens with a diameter of 5 cm.Remember to be a flat -convex lens, dual -convex and new moon -type uneven lens, and the effect is very poor, mainly because the color difference and Qi change are very powerful.A combination of lens is generally between 1: 8 or 1:15, such as a lens with a caliber of 5 cm. Calculated by 1:15, 5x15 = 75 cm, our piece is 80 cm or it is okay or it is still possibleEssenceIf you press 1: 8, it is 5x8 = 40 cm, which means a lens with a diameter of 5 cm. The focal length is between 40-80 cm.The range of Telescopes that are too much will be very poor, just like you buy a magnifying glass with a caliber of 10 cm at a die shop. Its focal length is only more than 30 cm like this. Its proportion is far below the range of 1: 8There is only 1: 3, this kind of lens is not good. The image of the image observed is very powerful, unless you only plan to make a toy for children.

Astronomical Telescope lens production

The lens I use the whiteboard (thick paper) to roll the outer barrel, mainly to facilitate the installation of the lens barrel.allow.If your lens lens is also made by yourself, you can save this step, and just roll the lens lens to the same size as the diameter of the object mirror.The diameter of the objective mirror is 5 cm, and a 3 cm grating should be made, because it is not a chromatography differential lens. The color difference is still there. It can only be eliminated by sacrificing the caliber.If you spend hundreds of dollars from the Internet and get a lens with poor color eliminations, this grating can be saved, and it will not sacrifice the amount of light of the caliber.

Astronomical Telescope lens barrel production

I use some hard paper Tube to do it. You can go to the jet place to ask others.

The focal length of our objective mirror is 80 cm, and the length of the lenscin can only be about 20 cm shorter than the focal length. Because everyone's vision is different, we also need to make a mirror barrel to adjust to watch people with different vision.Generally, the hard paper Tube obtained in the workshop is relatively long. You can use a saw to see a short paper cylinder according to the focal length of the lens.

Astronomical Telescope eye mirror production

Next, make eyepiece. This kind of lens is the easiest to find everyone. You can buy almost on the ground. Here I use the amplifier of repairing clocks, because the eyepiece for this Telescope is the same.It is general. Of course, you can also use other lenses. The source of the lens is a variety of. Two two pieces of the focal length can form a composite mirror with a focal length of about 2.5 cm.The distance between the two lenses is two -thirds of the focal length of the single film. The focal length can be shortened to three -quarters of the original single -chop focal length. This ratio is seen in other books that make Telescopes, but according to my experience, let's take my experience.Two lenses directly ask about three millimeters, which can shorten half of the distance.

It is also very good to make a large magnification mirror. Its magnitude of the magnification is about 5 times. The focal length and the amplifier of the clock repair watch are about 4 cm.OK, but the magnification rate is small. If there is a single -block focal length of 3 cm, the lens is better, two pieces are fine, and the focal length can be about 2 cm.2.5 cm = 32 times. If the focal length of the eyed mirror is 2 cm, then its magnification is 40 times. If you get a magnifying glass with a focal length of 1 cm, the magnifying rate of this Telescope will reach 80 times.The magnification of the Telescope is that the focal length of the objective mirror is except the focal length of the eyed mirror is equal to the magnifying multiple. We cannot ignore the imaging quality for the blind pursuit of the magnification. In the same caliber, the higher the magnification, the darker the picture.Observation and watching the moon at night are okay. It is not necessary to see the stars. Even if your magnification is 200 times, it is still a small light spot in the Telescope.

Astronomical Telescope eye lens barrel production

Next, we want to make the eyewarbar, because we use the hard paper Tube of the inkjet material, and the lens barrel can only be rolled to the lenscin.The mirror barrel is done with about 250 grams of whiteboard cardboard (thick paper like kraft paper). It rolls a few layers to achieve a certain thickness. It feels like a certain strength.I usually roll 4-6 layers like this, because the whiteboard cardboard itself has a certain hardness, and it is convenient to curl. The rolled lens cylinder has a intensity and a little elasticity, which is very suitable.After the roll, you can make a light grid on the inner wall. It is best to make a few racks. According to the length of the lens barrel, I do a maximum of three, that is, a grating is made in a few centimeters in the diameter barrel.Reduce light reflex on the inner wall, so that observation is no longer affected by mixed light, and it has a great guarantee for imaging quality.Then make a eyepiece connection, which mainly inserts the eyepiece mirror to facilitate the replacement of different focal length eyepiece to form a different magnification.

Finally, use glue to stick the eyepiece to the diameter barrel.

Astronomical Telescope is made of front mirror

At this point, a Telescope is basically completed, but at this time, the scenes watched are upside down, which is upside down, which has little impact on astronomical observations, because the stars and planets are basically round, and it does not matter. If it is used during the day, it is used during the day.If you come to observe the scenery, it feels not so comfortable visually. At this time, you can make a positive mirror to improve this vision.It is positive, but the left and right are upside down, but this has little effect on viewing.The shell of the positive mirror is made of the corrugated paper of the packaging carton. It has thickness and a certain strength, and the materials are easy to find and easy to paste. A small mirror is sticking inside.Or the kind of disassembly in the slide, the average ordinary mirror is also fine, but it can only be used to watch the scenery during the day. It is not good to see the stars and the moon at night, because the coating is under the glass, and the glass has a certain amount of glass.Thickness, when the light is shot oblique, multiple reflexes occur between the silver -plated layer under the glass surface and the glass under the glass. The thicker the mirror, the more obvious the phenomenon of multiple reflexes. At this timeBecome multiple.This has an unnecessary impact on observation, so it is best to use the reflex mirror on the surface with silver or aluminum, and the mirror should be flat, otherwise the image will change.

After all the above were done, a Telescope was basically completed.

What do beginners learn yoga first?

It is not difficult to practice yoga from scratch. As long as you master the essentials of action and continue to practice, you can slowly master it.What are the simple yoga movements?Today, the editor teaches everyone to let everyone start from scratch.

1. Half -month

Standing on the yoga mat, hold your chest, adjust your breathing, stretch your hands slowly upwards, cross your fingers and hold your arms closely with your ears, breathe deeply, vomit slowly, and bend down from different angles.

2. Tree style

Stand up your body, two feet together, look at the front of your eyes, let your body focus on your left foot, then slowly raise your right foot, hold your right foot with both hands, and place your right foot on the root of the left foot., Tighten your hips, hold your hands on your chest, and persist for 10 seconds.

3. Triangle stretch

Stand straight, take a deep breath, then separate your legs, lift your hands from the side, exhale, put your right hand on your right foot, move your left hand together, look at your left hand finger, keep it for 3-5 minutes, continue to breathe deep, and finally suck, suck, finally, suck, finally, suck, finally suckWhen you are qi, restore to the straight way, and change to the other side.

4. Hibari

Sit on the ground, keep your upper body straight, bend your right foot, place the heels at the perineum, straighten your left leg back, support the ground with both hands, and after balance, the arms are flat.Inhale, as much as possible on the upper body, expand your chest, breathe comfortably, keep your posture for 10-15 seconds.Restore to the straight way, change your legs and do.

yoga entry action

1. Prayer

Method: stand upright and move together.Hold your hands on your hands.Relax the whole body.Mix evenly.

Benefits: Establish a state of concentration and tranquility, and prepare for the practice.

2. Show arm type (raised your arms upward)

Method: Raise your head upward, and the arms are separated from the shoulders.Raise your head and your upper body slightly.

Breathing: Inhale when raising your arms.

Benefits: Stretch the abdominal organs, so eliminate excessive fat and improve digestion.exercise arm and shoulder muscles.Strengthen spinal nerves and open pulmonary and lobe.

3. Forestyle (hand touched)

Method: The body flexes forward until any side of the hands or fingers touches the feet, or on the ground in front of the feet.Touch your legs before using your forehead, but do not strain.Keep your knees straight.

Breathing: exhale when your body is flexed.Try to shrink the abdomen at the final position and exhale the maximum.

Benefits: help to eliminate or prevent stomach or abdominal diseases, and reduce excess fat in the abdomen.Improve digestion.It helps to eliminate constipation, make the spine soft, and strengthen the spinal nerves.

4. riding style

Method: Try to stretch your right leg back.At the same time, bend your left leg, but keep your left foot in place.Straighten your arms, in situ in situ.At the end of the action, the body weight should be supported by both hands, left foot, right knee and right toe.In the last posture, the head should be lifted back, the back into a bow shape, and staring upwards.

Breathing: Inhale when the right leg is stretched backwards.

Benefits: massage abdominal organs and improve their activity functions.Strengthen the muscles of both legs and get nerve balance.

5. Mountain -style

Method: Straighten your legs, move your feet together, lying your body forward, your hips are raised in the air, and your head is low, making it located between your arms.The body should become two sides of the triangle.In the final position, your legs and arms should be straightened. In this posture, try your two feet to the ground.

Breathing: Straighten your legs and bend your torso.

Benefits: Strengthen your arms and legs and muscles.Stiring the spine in the opposite posture, which further helps the softness of the spine.Strengthen spinal nerves and provide them with fresh blood.

6. Eight -bodies

Method: The body is lowered, so that when the last position of this posture is only toes, knees, chest, hands, and chin touching the ground.The hips and abdomen should be slightly lift away from the ground.

Breathing: After exhausting, you can take the breath.

Power: Strengthen thighs and arm muscles.Develop chest.

7. Snake style

Method: Straighten your arms and raise your body from your waist.The head faces backwards, the same position at this stage is the same as the last position of the cobra.

Breathing: Inhale when you lift your body and the back of the bow.

Power: The abdomen is compressed, which helps to squeeze out congestion from the abdominal organs.This posture is very useful for all stomach problems, including indigestion and stool.The back of the bow exercise the spine to soft the muscles and rejuvenate the most important spinal nerve.

8. riding type (the same as posture four)

Method: Qu's left leg, so that the left foot is forward, so that it can get close to both hands.At the same time, lower your right knee to touch the ground.

Breathing: Inhale when the right leg is backwards.

Benefits: See Pose 4.

9. Forestyle (hand tincture) (the same as posture three)

Method: Put your right foot next to your left foot, straighten your legs, and try to get as close to your knees as close as possible.Don't do it hard if you don't touch your knees, but your legs cannot be bent.

Breathing: exhale while doing this.

Benefit: See Pose III.

yoga beginner practicing yoga precautions

1. Avoid greasy and spicy diet.Do not eat within at least 3 hours before exercise, and it is more scientific to eat 1 hour after practice.

2. Before practicing, you must try to solve the big and urinate as much as possible.

3. Bath at least 15 minutes after practicing yoga.

4. Don't do yoga under the scorching sun.

5. When the upside -down posture of the upper body, patients with hypertension, hypertension, people who have suffered injuries on the head, dizzy patients, and people who fail to do it.Essence

6. Don't worry about your bones and bones, you can't bear the torture of various postures. In fact, as long as you follow the teacher's practice procedure, and then cooperate with the teacher's breathing and stretching your body, let it go naturally and slowly.

7. Training yoga should wear simple and loose yoga clothes as much as possible.It is best to bare your feet when you practice, and remove your watch, Belt or other ornaments.

8. Strive to practice at the same time every day.

9. Maintaining air circulation during training is important for regulating interest.

10. The mats must be supported, too soft or too hard, and must not let the feet slip.

11. Some people learn yoga from books or videos.Practitioners must make sure not to do too much, so as not to cause harm to the body.

How long does it take to learn yoga zero

Everyone will learn yoga when learning yoga118One move, including not limited to sitting, standing, lower waist, front -curved, back -curved, inverted, each one should learn at least half a monthEssenceYou can choose a professional yoga training institution to register for yoga, which can effectively improve efficiency. Generally,2-6You can learn it in a month.But all you learn, breathing, guidance, and some theoretical knowledge.

What should I do if I begin to learn yoga?

1As well asBack to the physical exercise, start with the foundation

The body is stable and strong, and the power of the soles of the feet comes from the earth. The power of the earth is transmitted upwards. Each joint is correct, and the surrounding ligaments are tightened and the position of the Bone is started.

2As well asBack to the observation of breathing, follow the breath to drive the body; at the same time, follow the body, breathe deeply

Breathing is the power of the body. With the driving of breathing, the gas promotes blood operation and blood nourishes the veins.In the fusion and conformity of breathing and body, breathing and breathing, breathing exercises through physical movements.

3As well asThe heart is quiet and gentle, and the qi is soft and soft

Learn to observe and experience yourself at every moment, which also includes awareness of sensory sense and practice.Be careful, just like the water stops, the inside is peaceful, the outside is calm, with softness, and cultivating the current heart.

1. What is Luya pole hardness

Luya's hardness English is called "POWER", which refers to the maximum load value of Luya pole and the weight of the bait suitable for throwing.The hardness of the Luya pole is divided into several Levels from soft to hard: Uul-Ul-L-ML-MH-H-XH-XXH.Among them, "M" is the boundary, the above is soft, and the following are hard.

The hardness classification of Luya pole is as follows:

Uul -Ultra Ultra Light is extremely soft

UL Ultra Light is super soft

L LIGHT soft, suitable for high proportion of soft insects, with leaders, small and medium minnow, etc.

ML Medium Light is soft, suitable for little fat, medium -sized Mino, pencil, etc.

M Medium is medium, suitable for VIB, deep submarine, lead head hook, etc.

MH -Medium Heevy is hard, suitable for shrimp -type high -gravity soft insects, spinner bait (composite sequins), Buzz bait

H HEEVY is hard, suitable for medium and large Mino, bullet lead fishing group, spinner bait, Rubber jig, etc.

XH Extra Heevy is super hard, rubber jig, Bags of heavy fish, etc.

xxh Extra Extra Heevy

2. What is Luya pole tone

The tone of Luya pole, said in the English word "ACTION", the bending point of the fish stress pole body in the fishing rod is getting closer and closer.The advantages of the dividing line, the advantages of the rod is to operate road bait and accurate throwing, the slow rod is easy to feel the fish, and the pressure on the line is less.The detailed introduction is as follows:

SSIntersectionSuper SlowSuper slow tone, 5: 5 curvature, suitable for pencils, long body Mino, floating Mino, surface series, etc.

SIntersectionSlow is slow, 4: 6 curvature, that is, the tuneness of the pole is 40%in the direction of the tip of the pole, suitable for Crank bait, SPINNER bait, etc.

MR Medium Regular is slow.

RIntersectionregularIn the middle, 3: 7 curvature, that is, the tuneness of the pole is 30%in the direction of the pole tip, suitable for Rubber Jig, VIB, minnow, high proportion, etc.

MF MEDIUM FSST medium fast adjustment.

FIntersectionfastFast, 2: 8 curvature, that is, the tuneness of the pole is 20%in the direction of the pole tip, suitable for Rubber bait, lead soft fish, thunder frog, etc.

FFIntersection1.5: 8.5 curvature, that is, the tuneness of the pole is 15%in the direction of the tip of the pole, suitable for lead soft fish, thunder frog, etc.

XFIntersectionSuper fast -tone, 1: 9 curvature, that is, the tuneness of the pole is 10%in the direction of the tip of the pole.

3. How to choose the hardness and tone of Luya pole

1. Hardness

The soft rod is suitable for throwing small bait fishing fish.When throwing, we will use the elasticity of the pole tip, because the soft rod elasticity is good, the bait range is small, the bait is more comfortable, the big bait pole is easy to break, and it is not far away.The elasticity of the pole tip of the hard pole is not enough to drive the small bait. One is uncomfortable, and the second is not far away, so the hard pole is suitable for throwing big bait.

2, tone

Children's pole is suitable for handling hard bait, fast -tone road Asian pole is suitable for manipulating soft bait.Because the sensitivity (conduction) of the pole is different, the faster the tone, the better, and the more obvious the bite of the fish is perceived, so we often choose the tone of the fast -tuning above -F or XF.And the throwing high -adjustment (MF) pole is better than the fast -moving pole, and the comprehensive performance of the medium fast adjustment is strong. In order to solve the problem of throwing, beginners often choose medium fast poles.In the middle, the below -M, S, SS, the sticky fish is better, it is not easy to run fish, and at the same time, it can filter the vibration of the hard bait itself, thereby enlarging the fish news.

We can choose the Luya pole of different hardness and tone according to different fishing grounds and target fish.For example, the Leiqiang fishing method in the heavy grass area, we can choose the median hard pole; and the use of soft bait fishing catfish, in order to perceive the slight motion of the water, can choose the soft fast rod.