Sys_Sam's Articles

1. Steps of the installation process of city circuit lamps

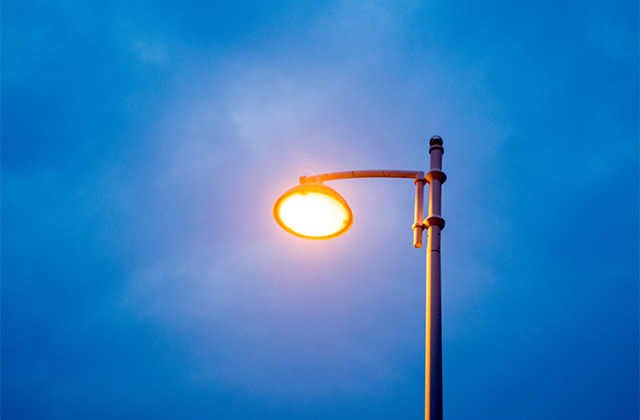
The city circuit lamp consists of the lamp head (light source), light pole, embedded parts, mixed soil foundation, lightning -absorbing corner iron, PVC Tube, wire, cable, control box (time and space switch, exchange contactor, leakage protection device) and other parts.The installation process steps are: basic positioning basic pouring construction cable protection groove slot slot threading pipe support threading cable protection groove backfill lamp wiring street light control installation:

1. Basic positioning

The survey address is determined to determine the position of the light pole. At the same time, there is no cable, pipeline and other facilities below the excavation location. Based on the above, the high -voltage wire must be avoided, and the leaves are used to avoid the safety of the leaves to ensure the safety of construction.

2. Basic pouring construction

Dig a basic pit with the corresponding size according to the drawings, then enter the lightning -absorbing angle iron, use the concrete to enter the cushion, and then fix the embedded parts; finally put two in less than less than 30mm arc -shaped threading Tube, the threading Tube of the threading Tube, and the threading Tube.One end is placed in the center of the four screws of the embedded parts, one of which comes in in the direction of the main cable, and the other one ends in the direction of the main cable.

3. Cable protection groove slot

In the case of cement pavement or street road surface, a cable protective groove should be dug into the cement slot. The depth of the slot should be determined according to the actual situation.
4. Circuit Tube supplement

The thread is generally used for cables. One end is fixed on the guidance steel wire. The piercing rod is introduced. On the basis of embedding, there is -shaped semi -circular, which is used for wiring.The length of each round line is determined.

5. Cable protection groove recovery

The hidden project can be filled in the cable protection groove after confirming the qualification, and the layered landfilling when the backfill is returned.

6. lighting assembly

Divide the light rod to each foundation, and assemble the light rod arm on the side of the road parallel. Do not scrape the wire in the light rod during the thread to protect the cortex;Adjust the parallel degree of the light surface and the parallel surface of the light head and the elevation of the light head, and try the temporary power supply.

7. Establishing rod wiring

The vertical rod is divided into two types: artificial vertical rod and mechanical vertical rod. Pay attention not to press the French disk to the wire and cable to prevent the leakage of the Skin.Do not touch the surrounding high -voltage lines or other buildings when standing.Add the cushion under the buried nut and use nuts to fasten.Effect the light rod, the light pole must be perpendicular to the road surface.Then faste the pads of the lightning -absorbing angle iron, and the conditions are allowed to be welded to ensure that the light rod is connected to the pile with the lightning corner.Do a good job of connection between the main cable and the wire in the light rod, and do a good job of waterproof treatment. The phase wire of each lamp should be installed with a fuse. The fuse should be fixed., The upper end of the fuse should be connected to the wire, the lower end is connected to the power supply, and the lamp rod is connected to the ground wire at the same time.

8. Street light control installation

Street light control box components include leakage protection, timing microcomputer switches, AC contactors, separation switches, and electric meters. Check whether the connection is correct and whether the wiring is firm., Finally connect to the distribution box to connect the ground wire.

After the above steps, the rust -proof processing of the street light rod can be embedded in the street light rod. If the conditions are conditional, add an additional nut fastener. After the liquid asphalt is brushed, the city circuit light is installed.

2. What are the requirements for Outdoor street lights?

1. The protection of Outdoor street lights is divided into TT and TN systems, of which the TN system is divided into TN-C, TN-S, TN-C-S system.

2. The TT method refers to the protection system that directly grounds the metal shell of the street lamp steel rod, commonly known as single Lights.When the metal shell of the street -lamp steel rod is charged, the danger of electric shock is reduced by a low -voltage section. It is suitable for places where ground protection is very scattered. At present, it is rarely used.

3. The TN method of power supply system is the protection system that connects the metal shell of the street light steel rod with the working zero line. It is also known as the zero protection system of the street light connection. Once the device appears, the zero protection system can raise the leakage current to a short -circuit current to a short -circuit current.This current is very large, which is 5.3 times the TT system. In fact, it is a relatively short -circuit failure. The fuse of the fuse will melt.Safety.

4. The welding of the ground wire should comply with relevant regulations: flat steel is twice the width of its width, and at least 3 edges are welded. The round steel is 6 times the diameter. When the round steel is connected to the flat steel, the length of the round steel is round steel.6 times diameter.

Disclaimer: The above method stems from the index of the program system or the sharing of netizens. It is for your reference only and does not represent the research perspective of this website. It proves that it is effective. Please pay attention to the authenticity and authority of the source of the content of the content.Apply to delete & gt; & gt;Correction & gt; & gt;

For pets, prenatal and postpartum are very important periods. Production will consume a lot of energy and physical strength of female hamsters, and nutritional consumption is also very large.Pay more attention to avoid postpartum syndrome due to malnutrition.In addition, pay attention to cleaning for its living environment, so as not to be violated by germs at this time.

For pets, prenatal and postpartum are very important periods. Production will consume a lot of energy and physical strength of female hamsters, and nutritional consumption is also very large.Pay more attention to avoid postpartum syndrome due to malnutrition.In addition, pay attention to cleaning for its living environment, so as not to be violated by germs at this time.

For pets, prenatal and postpartum are very important periods. Production will consume a lot of energy and physical strength of female hamsters, and nutritional consumption is also very large.Pay more attention to avoid postpartum syndrome due to malnutrition.In addition, pay attention to cleaning for its living environment, so as not to be violated by germs at this time.

First place the cage in a quiet corner.The owner's action at home should be as quiet as possible.The mouse mother nurtured the rats in the early stage.The distance between the two cages should be as far as possible.

If it is cold, the wood chips must be thick.The upper layer of the wood chips can be paved with warm cushions such as tissue silk, paper cotton, and note.The proportion of wood chips is more, and the thickness of paper towels or paper cotton and paper strips is about thin. It is enough.

One thing to explain here is that ordinary paper towels contain fluorescence agents and mothers and mothers. If you can buy ego and environmental protection paper on the market, try to use environmental protection paper as much as possible.If it is useless, use a soft texture without fragrance paper towel.

If it is in the hot summer of the weather, this is the season when the mouse is the most prone to abandonment. The reason is that the temperature is too high.So in this season, the conditional mouse friends should try to keep the temperature as much as possibleAbout 25 degrees.Of course, do not let air conditioners blow directly to the mouse cage.

Pay special attention to diet, first ensure that food and water must be sufficient.In particular, to ensure that the water is sufficient, the consumption of water will increase with the growth of the rat baby, and it must be noted.Be careful when changing water and food, preferably when the mouse sleeps or is not around.

If you use a vacuum kettle, pay attention to the height of the kettle, because the mouse will actively drink water after opening your eyes, so the kettle should be well grasped.Too low, the wood chips may enter the Tube of the kettle, causing water leakage.Too high, the mouse babies can't drink it.Therefore, you should observe more and adjust the appropriate height.If you use a steel ball kettle, it is recommended to replace it with a vacuum kettle, especially usingThe recommendation of the spring -type steel ball kettle of AB cage is replaced.Because the baby is often licking the steel ball because of insufficient strength, the drinking water fails.

In terms of food, face must be sufficient.As for how many roots are fed, according to the number of rats, every day, every dayA babies of rats are about 2 ~ 3.If the number of rats is not clear, it is enough to be more than 10 a day.

Generally ten days later, the odor of the cage began to appear, but at this time, the mouse cage could not be cleaned.Especially after drinking water, the water consumption is amazing, and their urine volume is also amazing.Fortunately, they often sprinkle urine in a fixed place.So rats are bornAfter 10 days, you can carefully take out the water chips with urine, then wipe it with paper, and then add new wood chips.

In other positions, you can also take out the smell of dirty. By the way, take the stool and add wood chips appropriately.Because the previous wood chips were also flattened by them, the new wood chips were not only hygienic, but also the taste will be lighter.But these cleaning is also requestedDo about 10 days.clean the mouse cage after 2 weeks, and try to wait until the mouse can actively eat.Time can be grasped about fifteen days after the birth of the mouse baby.

In short, you must take care of the mother and hamster, manage your diet, rectify hygiene, and arrange mice.Avoid sick mice during this period, because their physique is deviated during the period of nursing.

1. How to inflatable the inflatable Tube in the Swimming ring

1. First charge the front airbag (with the picture and text), pull the air mouth out of the airbag, open the air Tube, insert the air Tube and the Swimming ring, and pinch with your thumb and index finger.60 % (squeeze the inflatable airbag with your fingers, about 2kg, and the mother's finger is pressed by about one finger, in order to achieve 60 % of the gas volume).

2. charge the reverse airbag again, the total gas volume reaches 90 %, the two fingers are tightly tightened, and then the gas mouth is pressed into the airbag.

3. Note: It should be slowly carried out when inflating.

two,How to cheer in the Swimming ring

1. Wipe the inflatable mouth of the Swimming ring to prevent the foreign body from blocking the foreign body and gently drag the inflatable door.

2. Or the launch of the surface of the Swimming ring, open the plug, and insert the straw into the door vertically.

3. Slightly push the straw to open the inner wall of the cutting door, or make the straw through the cut door into the Swimming ring.

4. Blow your mouth with your mouth. After full, use your hand to tighten the parts connected to the inflatable mouth with your hands.

5. Press the inflatable door into the Swimming ring to prevent scratching or peeling the soft plug and leakage.

three,How to deflate in the Swimming ring

When you are airing, you can use a card or toothpick and other fine objects to extend from the pores and press it inward.

1. yoga ball inflation method

1,First, we pulled out the sales of the newly bought yoga inflatable mouth.

2,When pulling off the sales, find the pipe for inflatable. The yoga ball has a special inflatable pipe. Do not confuse and insert the small mouth of the inflatable pipe into the inflatable mouth of the yoga ball.

3,The other end of the Tube is connected to the inflatable port of the inflatable pump.

4,Finally, press the inflatable pump to inflation, press the inflatable pump to the end, and then let go of the inflation. After filling the air, pull out the Tube and block the sales of the air inlet.

Note:

During the inflatable process, the sphere should be measured at all times to prevent excessive expansion.Too much expansion can easily damage the ball.If it is inflatable in cold Outdoor in winter, it is 15%to 20%less than usual, because once you enter the warm indoor, the yoga ball will be in danger of blasting.It should also be noted that the heater, heating, etc. will weakly alolk the surface strength of the sphere, so do not approach.

two,yoga ball Moving Method

1. When buying yoga balls, there is a special plug that is equipped.

2. After getting the yoga ball, you must put the ball open, find the "white gas" on the ball and pull it off.

3. When the gas is fast, you can use the air pump to draw the air.

4. Then put it away and wait for the next use.

1. Is it okay to wear Polarized glasses on cycling?

Many cyclists tend to choose Riding glasses with polarizing function when choosing Cycling glasses. Some riders do nt know why they need to wear Polarized glasses, so is it good for riding Polarized glasses?

1. The polarizer uses the principle of polarizing the light. When the sun is projected on the road or the water surface, it will directly stimulate the eyes, making the eyes feel dazzling, fatigue, and unable to stay visible.In addition to the scattered light in the beam, the light can put the eye visual image in the transmittance of the rail, making the field of view clear and natural, so it is more suitable for cycling.

2. In addition, polarizing Cycling glasses can also strengthen contrasts, reduce reflection, enhance the color of the scenery, and reduce the phenomenon of atmospheric fog, so that the scenes seen during cycling are clearer, and there will be no feeling of scene distortion and dizziness.Essence

3. sunlight will emit three types of light, light, infrared, and ultraviolet rays. Among them, ultraviolet rays will hurt the Skin and eyes of the human body. Wearing Polarized glasses can polarize the light and block the harmful light without affecting the harmful light.Through the visual light, protect the eyes.

In summary, it is very good to ride polarizing glasses.

2. How to choose the right polarized ride glasses

The choice of polarizing Cycling glasses is very important. It is related to the protection of the eyes during the cycling process. Therefore, it is necessary to purchase high -quality Cycling glasses through regular channels. It can be selected mainly from the following aspects:

1. Consider quality

The polarizing mirror is mainly used for anti -ultraviolet rays and filtration polarizers. Good Polarized glasses can block more than 90%of ultraviolet penetration, while inferior Polarized glasses will increase the damage to the eyes. ThereforeThere is a polarizer with the best blocking of UV400.

2. It is suitable for the truth of the vision

You can try it first when you buy it. Seeing how you feel, you should ensure that the color of the surrounding environment should be made after wearing the Polarized glasses, the edges of the object are clear, and the signal Lights of different color signal can be effectively identified.Safety.

3. Look at the quality of Riding glasses

You can ask the merchant to obtain a quality inspection report for cycling polarizers. Looking at its materials, processing, etc., high -quality polarized Cycling glasses usually use TAC polarizers, PC integrated polarizers, nylon polarizers, NXT color -changing polarized lenses, etc.Type type; In addition to the material, the main attention: The polarizing shaft installed after the polarization lens is installed in the frame should be in the horizontal direction, the deviation should not exceed 5 , and the difference in the direction of the polarized axis of the left and right lenses should not exceed 6 6