Articles in Tags emergency packages

[Use of a car startup power supply] How to use the car emergency startup power of the car starting power supply

Correctly use multi -functional car emergency startup power supply 5V Digital product charging steps:

1 , First turn on the total switch of the automotive emergency power supply, as shown in the figure:

2 Again USB The connector is inserted into the car emergency startup power supply USB Interface, as shown in the figure:

3 , Choose the right charging head to charge the phone, apple 4 ,apple 5 ,apple 6 There is a dedicated connector, and other Android smartphones are basically basically Micro Interface, as shown in the figure:

4 After the connection is completed, press the power switch button to charge. At this time, the charging operation is completed, which is the same as the use of mobile power.

Correctly use multi -functional car emergency startup power supply to the laptop.

1 First confirm how much the input voltage of the notebook is.This is Lenovo Notebook, 20V Voltage, we choose here 19V Voltage power supply test.

2 2. Remove the battery of the notebook and then power supply. Some manufacturers say that they are directly inserted and used. This way of operation is okay. After picked up, it will charge the laptop battery.As a result, the use time is reduced, and the use of Outdoor or Outdoor office use is only for a long time.

3 , Select a suitable notebook charging connector that can be inserted. 8 One.

4 Connect the connector with the laptop.

5 Then connect the laptop to the connector with the connector. Here you can connect it first, and then connect to the laptop.

6 After opening the car emergency start power switch, 3 Switch the voltage of the laptop through the switch button within seconds V Numbs, what we choose here is 19V Voltage.

7 2. Insert a notebook connection line into the notebook output port of the emergency starting power supply of multi -functional vehicles.

8 Press the booting key for the laptop.

9 At this point, the use of notebook charging has been completed.Dear, start the laptop.

Correctly use multi -functional car emergency start power to start or ignite the car:

1 We must first open the car's hood, and we must support the hood.

2 , Find the position of the battery, the positive pole that is correctly clamped to the battery (red " "Positive, black" " - "For the negative pole), everyone must clamp it and not be able to clamp the positive and negative poles, otherwise it will bring hidden safety hazards.

3 2. Open the starting port of the car emergency startup power supply.

4 2. Insert the blue connector of the battery clip into the ignition interface of the emergency startup power supply.

5 Check whether the battery clip is clamped.Whether the positive and negative electrodes are connected correctly.

6 When entering the cab, the key to start, and some cars are started with one click, then click the start button directly to start the car.

Steps to use multi -functional vehicle emergency starting power Lights:

1 , After turning on the total power switch, long press 3 The second switch button can turn on the strong light lighting.

2 , Press the switch button, it will enter the flashing work state, and then press it again SOS Seeking a signal light.

precautions for the Emergency Starting Power of the car:

1 When there is no adult monitoring, do not let children use automobile emergency starting power, should be placed where children cannot get;

2 , Do not heat up or throw the car emergency startup into the water or fire. Putting the power into the water will fail the battery. Putting the power in the fire will break the internal battery, or accident.

3 , After using the car emergency starting power, the power switch should be disconnected in time ,, So as not to get angry by fever and wait;

4 Do not use it for a long time, you need everything 3 Take out the charge once a month or so;

5 The car emergency startup power should be stored in a cool, dry place to avoid direct sunlight;

6 , Use the exclusive lithium charger for charging, cannot be mixed;

7 , Do not disassemble the car emergency power supply to avoid accidents;

8 Do not use the automotive emergency starting power to use under rainwater.The rainwater will conduct electricity, and it is likely to have a short circuit, which causes the automotive emergency starting power supply to be hot due to the instantaneous large current discharge, which will damage the battery or cause danger.

9 Do not touch the positive and negative poles of the clamp of the car emergency power supply!(Except for smart clips)

10 2. In the environment of high temperature or high humidity, the reaction of the battery itself cannot be intensified, so the reaction of the battery itself cannot provide sufficient capacity to the use of electrical appliances.In addition, under high temperature and high humidity, the aging speed of the battery will also be greatly accelerated, and electronic components will also be corroded (except for high -temperature batteries);

11 Do not turn the positive and negative pole of the starting port of the car emergency starting power supply, or use metal for a short circuit, otherwise the battery will swell or rupture to avoid accidents.
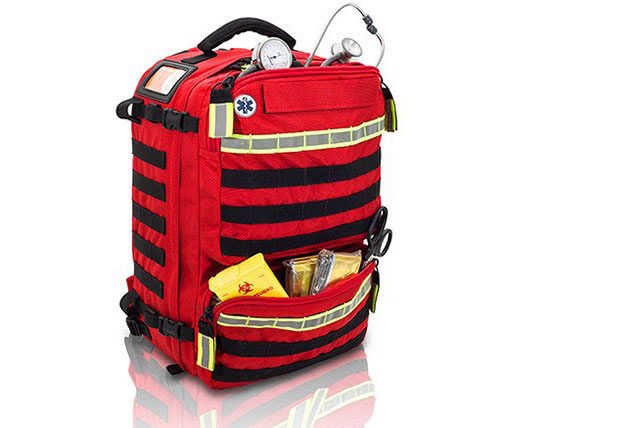
Earthquake rescue emergency package

Rescue Earthquake emergency packages generally large -capacity backpacks.It is generally made of waterproof fabric and luminous bars. The color should be bright and conspicuous, and it is easy to be found. It should not be selected for camouflage color and professional weight design.

In addition to the items in the general Earthquake emergency packages, the emergency supplies are generally adapted to the equipment used in the Earthquake disaster rescue, such as tents, Sleeping bags, seats, safety helmets, headlights, intercom, safety shoes, military engineering shovels, etc.

Earthquake emergency pack Category

Ordinary Earthquake emergency package

Ordinary Earthquake emergency packages refer to emergency packages required by ordinary people who do not need to undertake professional Earthquake rescue mission.It can provide self -rescue calls, individual protection, lighting, daily necessities, first -aid supplies and other supplies after the Earthquake, so that the affected people can actively save themselves, and fight for them a series of items waiting for the time for rescue, as well as ensuring the basic life after the disaster.

Because the Earthquake is the first of the disaster, most manufacturers' disaster prevention emergency packages take the risk of Earthquake as the main risk, so the general Earthquake emergency packages are replaced by disaster prevention emergency packages.

Earthquake emergency package for rescue

Earthquake emergency packages for rescue are also called Earthquake rescue packages, which are used for Earthquake rescuers.Ordinary people need to evacuate the building after the Earthquake and leave the disaster site, and the rescuers are just the opposite. They need to enter the disaster site to perform rescue tasks after the Earthquake.It also includes dedicated rescue equipment.

What are the Earthquake emergency packages including

Survival supplies

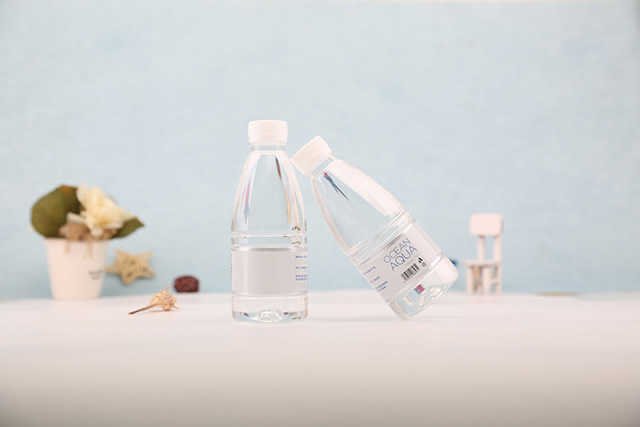
1. Water

For emergency, the three -day water used in the family should be reserved, and you can refer to the standard storage of 4 liters per person per day.Pay attention to the following points:

(1) If there are children, the elderly, and patients, they need to increase.

(2) The water must be installed in a clean, sealing, and easy -to -carry plastic bottle.

2. Food

Prepare enough listening foods or dehydrated foods, Milk powder and listening juice for 72 hours.Pay attention to the following points:

(1) Do not choose foods that are easy to cause thirst.You can choose no salt biscuits, all -Wheat, and canned food rich in liquid.

(2) Only foods that are not refrigerated, cooking or specially are reserved, and there are many foods similar to foods.

(3) Foods that should be included in babies and special diet, and some kitchen utensils and cooking utensils should also be prepared, especially manual tanks.

3. waterproof match, candle

Note: Before using a match or candle, please be sure that there is no gas leak.

4. Portable radio, etc.

Most telephones will be unavailable or can only be used for emergency purposes, so radio will be your best source of information.

5. Essential drugs (use or take under the recommendation of the doctor)

1) 2 slices of wine seizure and disinfection wet towels 5cm*5cm; 2) Gauze films 5*5cm 2 packs; 3) Elastic bandage 6cm*400cm 1 volume; 4) non -woven tape 1.25*500cm volume;7.2*1.9cm 10 tablets; 6) 12.5cm of tweezers; 7) scissors 9cm 1; 8) 1 1) 1) Blood Belt 46cm*2.5cm; 9) Red Outside 13.5cm*10cm*5cm 1; 10) Space insulation1 first aid blanket; 11) 1 pair of high -strong anti -sliding gloves; 12) 1 3M dust mask; 13) 3 liters of environmental protection folding kettle; 14) 1 light insulation raincoat; 15) 2 compressed towels; 16) fever fever, feverTwo slices (heating for more than ten hours); 17) Wind-proof and waterproof match 1 Tube (twenty-off); 18) Changming candle (3-4 hours of burning time); 19) compressed biscuits.

Self -rescue

1. Medical supplies

The auxiliary materials and first -aid manuals that deal with trauma include first -aid supplies such as bandaging, hemostasis, fixing, and wound treatment, which describes the emergency manuals that deal with various trauma methods.

tools and supplies

1. Special supplies

Prepare necessary special supplies, such as medicines, spare glasses, Contact lenses, hearing aid batteries, baby items (baby food, diapers, bottle and pacifiers), sanitary products (small wet towels and hand paper), etc.

2. Important documents and cash

Make sure that when the automatic withdrawal machine, bank and credit card system are paralyzed, sufficient cash is available.At the same time, retaining credit certificates, ID cards, and photocopies of some important documents, such as passbooks, insurance policies and financial records.

3. Other emergency supplies

Other Earthquake emergency tools such as seeking bonus, abrasion -resistant gloves, emergency Raincoats, and handlights of hand -shaken power generation.(For reference only)

How to install Earthquake emergency packages

First of all, the most important point is to put the heavy objects on the upper half of the shelter. The advantage of this method is that the focus of emergency backpacks will move up, and people's back will be not so tired.

Secondly, you need to put food and water at the top of the shelter. It is most convenient to eat food in this way without turning over other items that have been installed.The use frequency is relatively low -cold, bathing, and sleeping supplies, and should be placed at the bottom.

Where should the Earthquake emergency package be placed

In the room, the bathroom is undoubtedly the best place to hide, but the Earthquake emergency package is best placed nearby, such as in the bedside table.In addition, in the process of Earthquake escape, it is best to wear buildings, helmets, etc.(Note: Steel helmet and building helmet are better than motorcycles).Of course, it is better to install self -rescue items such as ropes and saber in the shockproof bag.

Earthquake emergency packages are best placed in the toilet or room content. The items in the emergency package should be replaced in a timely manner according to their respective production date to ensure that the items in the emergency package can be effectively used.

Finally, pay attention to writing contact information on the Earthquake emergency package, and the items inside the package are replaced regularly.

The purpose and tools of first aid bandaging

1. Purpose

Protect the wounds, reduce pollution, fix the dressing, drugs, fractures, compress the hemostasis, reduce pain, etc.

2. tools

(1) Scroll bandage or triangle scarf, special parts can be used with poly heads or butycles.

(2) Sterile gauze.

(3) In cases of first aid, such as no bandage and gauze, you can replace with clean towels, clothes, etc.

Introduction to first aid bandage methods

1. Basic bandage method of scroll bandage

(1) Circle bandage method:

When the bandage starts and ends; fix the bandage of small wounds in thick and detailed parts such as neck, wrist, chest, and abdomen.

Step of operation:

Overlap bandwing (not less than 2 weeks).

The bandage will be completely covered next week.

Fold the end of the band of the end of the band, fix it with glue or safety, or cut the middle of the band tail into two ends to avoid the wounded area and fix it (the following bandaging fixing is according to this method).

(2) Snake -shaped bandage method (oblique stretching method):

It is used to quickly fix from one place to another, which can be used for fixation of plywood.

Step of operation:

Trigger the bandage around for two laps.

Taking the bandage width as the interval, the oblique row is not covered by each other.

The bandage is wrapped around for two laps again.

The fixed method is the same as the bandage method.

(3) Spiral bandage method:

It is used to bandage the same parts such as upper arms, fingers, trunk, thighs, etc.

Step of operation:

Trigger the bandage around for two laps.

Slightly inclined (& lt; 30 ), and the spiral is wrapped up.

Cover 1/3 to 1/2 last week.

Wrap the bandage around two laps again and fix it.

(4) Spiral anti -folding bandage method (folding method):

For parts with varying diameter, such as forearms and calves.

Step of operation:

Trigger the bandage around for two laps.

Slightly inclined (& lt; 30 ), and the spiral is wrapped up.

Fold the bandage down every week to cover the 1/3 ~ 1/2 of the last week.

Wrap the bandage around two laps again and fix it.Be careful not to reflect on the wound or Boolon.

(5) "8" -shaped bandage method:

For parts with different diameter or bent, such as elbow, shoulders, hip, knees, etc.

Step of operation:

After flexing joints, the joints are bandaged for two weeks at the end of the joint.

The right hand stretch the bandage from the lower right to the top to the left, bypasses the back, and then stretch the joint to the left from the upper right (near the heart) to make the "8" shape./2.

Circle bandage for 2 weeks fixed.

(6) Return to the bandage method:

It is used for bandaging parts without the top, such as finger, head, amputation.

Step of operation:

Circle bandage for two weeks.

The bandage is folded up and bandaged vertically with the right hand. The center of the residual end is covered, and then the left and right sides are alternately covered.

Then fix the bandage reflection ring for 2 weeks.

2. Triangular scarf bandage method

The size of the triangle scarf should meet the specifications.Applying surgical knots (Square knots) during knots has the advantages of firmness and rapid solution.

(1) Bringing method on the top of the head:

Fold the bottom of the triangle scarf up to about 3cm.

Put the middle of the middle part of the wounded forehead, flat with the eyebrows, and pull the top corner to the back.

The two corners of the triangular scarf are above the ears and two ears, pull the pillow to cross, and then go to the forehead to fix it; Turn the top into the top.

(2) The hats bandaging method:

The top corners of the triangle scarf and the center of the bottom are knotted each, which is the fans.

Place the top angle in front of the forehead, and the bottom edge is under the back of the head.

Hold the head and tighten the two corners to the face.

Fold the mandarin on the side of the two corners.

Pull the pillow and fix it.

(3) Facial mask bandage method:

Put the triangular towel on the top of the triangle and put it on the jaw.

Cover the triangle scarf on the face (cut a small mouth on the nostrils, eyes, and mouth).

Pull the left and right corners to the pillow and cross the pillow.

Go around the forehead to knot.

(4) Single eye bandage method:

Fold the triangular scarf into a four -finger width band.

Put it on the eyes.

After the lower side of the lower side passes through the pillow to the front side of the forehead, press the shorter end, and then surround the head to the jealum side temporal.

Jacking with another section of the down.

(5) Betting method:

Fold the folding into a four -finger width towel central minister first cover one side.

The lower end is behind the pillow from the ears, pressed the upper end through the opposite ear to the top of the eyebrow, and continues to around the head to the front of the opposite ear.

Slip the upper end and cover the other eyes.

Wind a knot on the opposite ear under the ears and the other end.

(6) Swallow tail scarf bandage shoulders:

Fold the triangle scarf into a tour tail, the big horn is above, and the small horns are down.

The angle of the tail tail scarf was placed on the upper shoulder of the wounded shoulder and the small horns were in front.

"

The large horns are pulled by the back of the back to the opposite armpit.

(7) Snaptles bandaged shoulders:

Fold the triangular scarf into a tour tail, two swallow tail horn and so on.

The angle of the angle faces the alignment department, and the tail tail is put on the shoulders.

The two swallowed corners pass through the left and right shoulders, and pull it to the armpit and the bottom corner of the dovetail.

(8) Triangular scarf bandage chest:

Put the bottom of the triangle scarf on the chest, about 3cm height on the elbow nest.

The top angle is more than the wounded shoulder and hangs the back.

The middle part of the triangle scarf is covered in the injury of the chest, and the ends are pulled to the back.

The top angle also knotted with the corner.

(9) Swallow -tail scarf bandage chest:

Fold the triangle scarf into a troor tail.

A folding side at the bottom.

Put horizontally on the chest, two corners upward, separate on both shoulders and pull to the neck.

Towards the top angle of the bottom into the opposite armpit and knotted with another bottom angle.

(10) Triangular scarf belly belly:

The top corners of the triangle towel are facing down, and the bottom is placed horizontally on the umbilicus.

Tighten the bottom angle to the waist knot.

The top angle is pulled to the top of the hip, and the remaining corner is knotted.

(11) Triangular scarf bandage upper limbs:

When the triangle scarf is knotted on the back of the wounded side, the head is left with a longer spare head; the other bottom angle is pulled along the back of the arm to the side shoulder.

The top angle wraps the wounded limbs.

The forearm flexes to the chest and tighten the two corners to knot.

(12) Triangular scarf bandage hand:

The fingers are facing the top corner of the triangle scarf, and the hand is placed flat in the center of the triangle scarf, and the bottom edge is located on the wrist.

Lift the top angle on the back of the hand.

Pull the bottom corners to cross the back of the hand, and then go back to the wrist.

Jie with the palm side or back side.

Note: The bandaging of the foot is the same as

(13) Triangular scarf bandage calf and foot:

Place your feet on the side of the near one side of the triangle scarf.

Specifies the long wrapped side to wrap the calf to knot.

Pub up with the bottom corners on the other side, knots around the ankle and the ankle joint.

precautions for first aid

1. When bandaging wounds, simply debride and bandage first.Do not touch the wound in your hands and stolen goods. Do not rinse the wound with water (except chemical injuries). Highlight the internal organs outside the body cavity. Do not recover. Do not take out foreign objects in the wound.

2. When bandaging, it should be reliable, loose and appropriate.

3. Make the patient comfortable when bandaging.Pay attention to breathing with your chest Belt, and pay attention to maintaining your function.Cotton pads or gauze are used for cotton pads or gauze at the osteotomy of the Skin wrinkles. When you need to raise your limbs, you should give appropriate support for support.

4. The bandaging direction is bandaged from the distant heart to the near -hearted end, and the finger (toes) should be exposed to observe the blood transportation situation.When the bandage is fixed, it should be placed on the outside of the limb. Avoid knotting on the wound, osteochidal or easy to be compressed.

5. When lifting the bandage, first unbutton the fixed knot or remove the tape, and then pass the loose solution with each other with both hands.When an emergency or bandage is soaked by the wound secretion, it can be cut with scissors.

Disclaimer: The above method stems from the index of the program system or the sharing of netizens. It is for your reference only and does not represent the research perspective of this website. It proves that it is valid. Please pay attention to the authenticity and authority of the source of the content of the content.Apply to delete & gt; & gt; error correction & gt; & gt;