Articles in Categorys Outdoor

1. How much watt is fit for Outdoor Tent lamps

Camping lights are also called Tent lamps. There are various types of steam lamps, fuel lamps, and electric Lights. Now more are used for electric Lights. LED light bulbs are used. So how much watt is it better to buy Camping lights?

The Camping lights are different from the Lights used in daily home furnishings. The Camping light does not require too much lighting and range, and the power is better and the battery life is longer. ThereforeAbout a dozen watts to about thirty or forty watts, there are also some high -power Outdoor Tent lamps. At about seven or eighty watts, the main thing to buy depends on the actual needs.

2. How many lumens are needed for Tent lamps

The brightness of the Outdoor open camp Lights not only depends on the Watshu, but also depends on the lumens. The output of the light is measured by lingering. The higher the lumens, the brighter the light. So how much is the Camping light?

The general Camping lights are about 100-240 lumens, and there are also some high-lumen or low Camping lights. When choosing, it is mainly based on the appropriate Camping light according to the number of people:

1, 100 lumen Camping lights are suitable for use in tents.

2. The 200 lumens Camping lights can be used for camp lighting, such as multi -person dinner.

3. During the opening of the camp, because there are more people, 300 lumens or even higher Camping lights usually need to be required.

Of course, it is important to note that the larger the lumens of the Camping lamp, the brighter the Camping light, which also means that it will consume more electricity. Therefore, it is recommended that you choose according to your needs and try to choose Outdoor tents that can provide multiple brightness mode adjustment functions.lamp.

3. Buy Camping lights to buy a few suitable

When buying Camping lights, pay attention to the number of Camping lights. Generally, according to the number of campers:

1. If it is a single Camping, basically just put a Camping light in the Tent and outside.

2. If there are many people, the range of tents is larger, and the number of Tent lamps needed. If 2 to 3 people, you can put one in the Tent, the living room account, and the inner account.

If you or more or more or use the tunnel account, you can use 2 main Lights and 2 auxiliary Lights, or use the light bar.

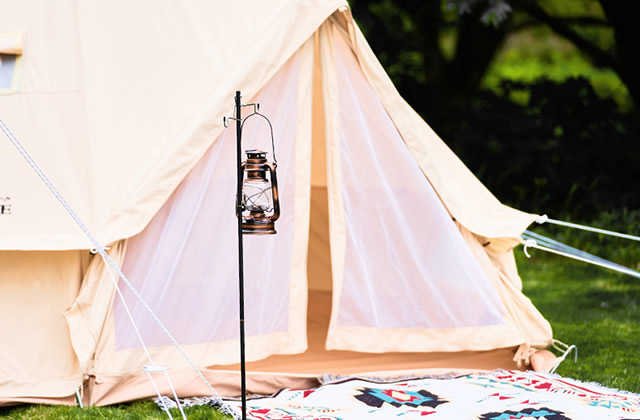
1. Composition and function introduction of Climbing stick accessories

1. Holder

Commonly used materials include rubber, cork, plastic and foam. Generally speaking, the grip of the previous two materials is more comfortable, but no matter which material is used, the focus is on the user's feeling!This is very subjective. You have to try and hold it yourself. You can feel more comfortable, and then choose your favorite style.However, when we use the Mountaineering stick, most of the time is exerted on the wristband of the Climbing stick. The comfort of handle material is not very important. For economic considerations, the materials of the first two are relatively high -level materials., So the price is naturally more expensive!If your budget is limited, this is one of the directions you think about!

In addition, some climbing rods and rods will show 15.The perspective, this is a design derived from the design conception of the Ski stick. It is mainly due to the effect of being able to stand on the ground to achieve the effect of the brakes during the downhill.It is not easy to stand up to the ground. It is necessary to be very skilled in the use of mountaineering sticks to get used to the particularity of the angle design. Therefore, we do not recommend that beginners or users who only walk in flat ground to buy such climbing sticks.

2, wristband

This part is the most needed part when we buy a Climbing stick, because when using the Climbing stick to help physical activity, we must use the wristband to transmit strength to the upper body, and use the power of the upper body.The power of the power to reduce the load of the leg.

When choosing a wristband, you should consider the durability, softness and width of the band itself, and you should adjust the length of the strap to facilitate the activity of the wrist.Take a test to determine the activity that will not affect the wrist or palm.

3.

In terms of materials, there are four types of wood, iron, aluminum alloy, and titanium alloy. The weight of titanium alloy is the lightest, aluminum alloy is second, and then it is wood.That is, the lighter the weight, the more expensive the price, but the price of wooden can not be compared with the above metal Climbing stick, because the wood can be obtained everywhere, without any cost!And some hand -made exquisite Hiking sticks are often scary, so the wooden Climbing stick is not listed here.However, if you want to use a ready -made wooden Climbing stick in the wild, please try to pick up the dead branches on the land as much as possible. Never cut the raw wood to protect the ecological integrity. It is one of the principles that should be complied with outdoor activities.

In terms of functions, it can be divided into two major categories: adjustment form and non -adjustment. The adjustment can be divided into three sections and tenon adjustments. The three -section formula is mostly commonly used by climbing Hiking people. Because the adjustment is large, it is suitable for different elasticity and suitable for different heightUsers of the body are easy to carry at the same time. When the terrain that is not suitable or does not need to use a Mountaineering stick, you can put it in the Backpack. The design of most mountaineering sticks on the market can be shrunk to the length of 30 inches.The adjustment of the tenon adjustment has less elasticity, which is more suitable for the Outdoor environment with general flat or slopes.

4. Seismic system

The shock absorption system is to reduce the impact of the Hiking stick. There is a spring inside the Climbing stick. It can buffer the impact force according to the need.The Climbing stick can turn off the shock absorbing system, and the price is more expensive than the Climbing stick with a shock absorbing system!But isn't the shock absorbing system good?Why should you turn it off?Please take a look at our instructions:

According to the correct way of use of climbing sticks, use the Hiking stick to push back in the uphill. When going downhill, the Mountaineering stick and the legs are used to bear the impact force of the body at the same time.But the shock absorption system will cut off the thrust in the uphill!In other words, we must use greater thrust to achieve the same effect as the average Climbing stick, so when uphill, the shock absorption system is an unnecessary device. ThereforeCome to adjust the shock absorbing system, turn it off when you do not need a shock absorption system!
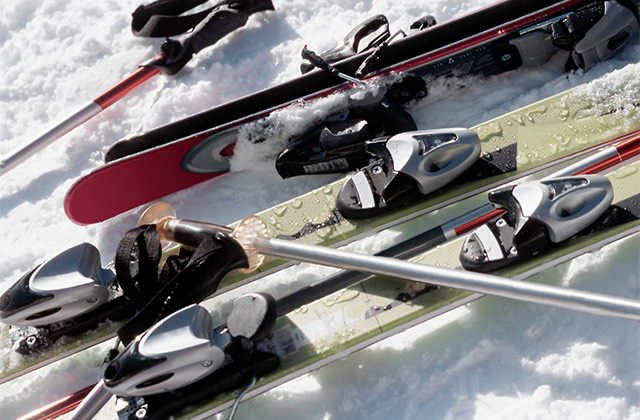
5. skiing

The Mountaineering stick is derived from the design of the Ski stick, so there are many places the same. The skiing circle is one of them. It can prevent the Climbing stick from being caught in the mud, but because of the environmental Hiking environment, there are many thorns shrubs, skiingThe setting of the circle will prevent the convenience of action, so it should be noted that the Ski circle should be able to disassemble quickly, so that it will not cause trouble.

6. Polar tip

The material is made of rubber head, iron, carbon tungsten and other materials. Carbon tungsten steel is the hardest, the price is the most expensive, and the rubber head is the cheapest, but it cannot cope with the rugged Outdoor terrain, and the wear resistance is not as good as the carbon tungsten steel head.

The appearance is also divided into two types, one is a traditional pointed form, and the other is a round head form; the pointed grip is better, but it is also easy to hurt the people nearby;However, it will not hurt partners. The appearance of some brands of mountaineering sticks is specially designed. The inside of the rod head has a sharp raised power that can increase the grip.When you buy a Mountaineering stick, you can pick up the rod head to look closely.

2. What are the use of Mountaineering stick accessories

The design of the Mountaineering stick is to provide a better stability when providing personal activities, and the impact force of the legs is decentralized to the arm; according to foreign research reports, during the uphillWhen using a Mountaineering stick, it is 22 % more than using a Mountaineering stick, and the energy consumption of thigh muscles is 21 % more.

1. Correct use of mountaineering sticks can reduce the pain of the knee, increase the strength of the uphill, increase the overall endurance, and use the soft area of the soil to increase the balance of the body

2. When you move on the uneven mountain road, the Climbing stick can keep your body balance and avoid some fall or stumbling.

3. When crossing the river, the Mountaineering stick is equal to your body to increase the fulcrum, which is conducive to maintaining a balance in turbulent and slippery rivers.

4. During uphill, the Climbing stick can help your feet help. When going downhill, it can help reduce knee vibration and reduce damage to the body.

5. There may be snakes when walking on a mountain road with bushes. At this time, you can use a Mountaineering stick to explore the road in front to play a role in playing grass.

6. Although it is not a beggar, with the Climbing stick, you also have a Dog stick. When you cross the village in the village, you can use it to deal with wild Dogs.

7. You can use a Mountaineering stick to make a simple sunshade to avoid the sun with a Mountaineering stick.

8. In winter, when there are snow with snow, you can use the Climbing stick to hit the snow on the branches, so that the snow will not fall on the body.

9. Some climbing sticks can also be used as a unicorn of the camera. While Hiking, if you still have photography hobbies, this Mountaineering stick is a good choice.

[weight loss exercises] Is it effective for slimming exercises? Basic action learning

weight loss

The reason why weight loss is suitable for weight loss is that in addition to it is a very good aerobic exercise, it is that it is full -body exercise, which will not increase the local burden of the body, resulting in negative effects such as thick legs or large hips., Strengthen the flexibility of the body.Long -term persistence can not only play a role in weight loss, but also condition the muscles, make the curve more beautiful, and have a better mental state.

Step 6 is oxygen and weight loss, weight loss without pressure

The morning Running every day during the student days, exercise during class and the training of 3 exercise courses a week make us usually maintain a healthy constitution, Slim figure, and after joining the work, there is no passive exercise.Many human forms have changed unknowingly.It can be seen that the weight loss effect of fitness exercises is beyond doubt.Today, let's learn 6 steps of fitness weight loss exercises:

Step first step

Action: Pier sitting and cheating

Objective: exercise upper body, cardiopulmonary vitality and lower body

First, stand straight with your feet, put your hands on both sides of your body, and then squat until your thighs are parallel to the ground, keep your arms slowly rising until the same line as your ears.Then stand up again, raise your right leg until your knees and hips are on one line, and then slowly sweep your arms across your body until your left hand is on the outside of your right knee, and finally stand againDo one side.It is recommended to take 12 to 15 times per group and take 30 seconds in the middle.

Step 2

Action: Swing like a stone

Objective: exercise the heart

Close to the ground at the bottom, make your forearm a support, your palms down.The guarantee of your arm is in a proper position, and then the toes are used as a fulcrum to tilt your body at the left as quickly as possible. At the same time, pay attention to maintaining balance, and then tilt to the west side.It is recommended to 8 to 10 times per group and take 30 seconds in the middle.

Step 3

Action: front bow and arrow step and twist

Objective: exercise your arms, heart, back and legs

Stand your legs separately, stand on both sides of your body, and then let your left leg forward make your right knee close to the ground and keep your left thighs balanced with the ground.The body tilted forward, trying to let the hands on both sides of the legs touch the ground.Take back the left leg, use this inertia to move the center of gravity to the right leg, and then bend your left leg back.Make a backward bow and arrow step, turn your body 45 degrees to the right, and finally stand again.It is recommended to replace the other side 12 to 15 times in each group, and take 30 seconds after 3 rounds.

Step 4

Action: push -ups full climbing

Objective: exercise chest, heart and hip

Close to the ground at the bottom, separate your hands to the distance of the shoulder width, so that your chest is as close to the floor as possible and keep the posture.Then bend the right knee to the outside of the right elbow.Go back to the original posture to do the other side.It is recommended to take 12 to 15 times per group and take 30 seconds in the middle.

Step Fifth Step

Action: fierce squat jump

Objective: Remove the lower body fat

Stand your legs on your legs, your toes are out of your feet, and your arms are placed on both sides of your body.Squat slowly until your thighs are parallel to the ground, and your fingers can touch the ground.Then immediately jump up as high as possible, keep your hand open and stretch straight over your head.It is recommended to take 12 to 15 times per group and take 30 seconds in the middle.

Step 6

Action: Voldemort

Objective: exercise triceps, chest and cardiopulmonary function

Separate your hands on the floor, close your chest as close to the floor as much as possible, keep your arms parallel with your body, at the same time vertical elbows and arms, and then restore.It is recommended to take 12 to 15 times per group and take 30 seconds in the middle.If you want to reduce the difficulty, you can bend the knee, which is not embarrassed to girls.

The above introduces 6 steps of fitness weight loss exercises.This fitness exercises are easy to learn, suitable for people of all ages.I hope these content can help people in need.But here we need to remind that exercise must pay attention to moderate.

1. What are the differences between Fishing rods and hand rods

The fishing rod is a fishing rod, and the fishing rod is also a fishing rod. For novice fishermen, many may not know the difference between these two Fishing rods. In fact, the fishing rod is also a type of hand rod.There are two types of Fishing rods and stream rods. Compared with ordinary hand poles, the differences between the Fishing rods and the pole pole are mainly:

1. Different length

The length of the table fishing rod and the hand rod is different. Taiwan fishing will have great restrictions on the length of the fishing rod, so the length of the fishing rod is generally not too long.The hand poles are different, because when designing them, they can fish in any place in any waters, so the hand pole is generally long.

2. Different structures

The structure of the fishing rod and the hand pole is also different, and there are two different types of fishing tools.There are some poles on the Fishing rods and hand poles, but the number and length of these poles are different.The pole section of the table fishing rod looks relatively long, but the number is relatively small; the pole pole is exactly the opposite. Their pole section is relatively short, but the number is more.

3. Different weight

There will be some differences in the weight of the fishing rod and the hand pole.The fishing rod is a relatively lighter type of fishing rod, which can be used to use it.But the hand pole is more bulky.In particular, one of them called the "stream pole" hand poles. Their structure is more troublesome and needs to be used after the bracket.

2. It is still easy to use by the table fishing rod

1. The advantages and disadvantages of Table fishing rods

The fishing rod is long and less, and the strength of the uniform strength when it is stressed.The artifacts of carp, catfish, and catfish are also very easy to use in competitive fishing.

2. The advantages and disadvantages of the hand pole

The hand pole can be retracted, easy to carry, and small shrinkage length, but the disadvantages are obvious: because of the many sections, the tone will be relatively softer, and the fish may not be able to make the big fish. It is suitable for traditional fishing.

Third, novice Fishing rods or hand rods

For novices who have just started learning fishing, it is very important to choose a suitable fishing rod. It is possible to choose a fishing rod or hand pole. It mainly depends on the actual situation:

If the frequency of fishing is relatively high and often goes out to fish, it is recommended to choose a wider range of Fishing rods; the frequency of fishing is relatively low, but if it is occasionally fishing for entertainment, then buy an ordinary stream rod.It is also easier to operate.

1. What is a Ski board fixed device

The fixed device is an important part of connecting skiing boards and Ski boots, which plays an important protective role in the personal safety of the Ski.The fixed device is divided into two parts, and the screws are fixed on the skiing plate directly. The front fixed device cannot be moved. The rear fixed device can move along the Ski board to adapt to the Ski boots of different sizes.

2. How to choose the angle of the single board fixed device

The angle of the single board fixed device is selected to adjust according to the type of the Skiboard veneer used in the position and used:

1. Choose according to the position

(1) Takayama Station

It is used for racing narrow boards, one -way gliding (the tail is Square), hard shoes, the angle of the front and rear feet fixers is between 35 degrees and 70 degrees.Generally, the anterior foot angle is 5 degrees larger than the rear anon to maintain the good control of the board when the small curve is maintained.

(2) Ahead

Freedom or chase boards are commonly used.The front fixed angle is 15 degrees to 40 degrees, and the posterior fixed angle is 0 degrees to 30 degrees.From the perspective of human structure, the angle difference between the front and rear fixers should not exceed 21 degrees.A commonly used mountain sliding angle configuration is 6 degrees after the first 21 degrees. If you like to slip, you can choose the first 30 degrees and 15 degrees.

(3) Duck standing position

The angle configuration of the common fixed device in the domestic ski resort is generally 0 ~ 30 degrees of the front fixers, and the rear fixers -1 ~ -20 degrees.Under this position, when you stand naturally, the front and rear knees are facing the head and the tail of the plate, and the shoulders are parallel.From the perspective of human structure, the angle difference between the front and rear fixers should start at least 10 degrees. The common configuration is the first 18 and the rear -6, or the front 15 and 15.

2. Select according to the type of Skiboard

(1) Running board (hard shoe plate)

The racing board is relatively narrow, and the angle has a lot to do with the size of the shoes.The general selection principle is to set first and then fixor angle: let the toes go out a little bit, and the heel has just fallen on the blade, so that it is convenient to put pressure on the board blade.As for the angle of the front fixed device, you can start from the perspective of the fixed fixed device 8 degrees. You can feel, adjust, and select the most comfortable configuration.

For the racing board, the angle of the fixed device is too small means that the body needs to be twisted significantly when doing large smoothness.(This sentence is not loyal to the original text.If the angle of the fixed device is too large, the carving blade is fine, but it is more difficult to control in the case of small bend or even medium.

(2) Free board or chasing board (soft shoe plate)

You can choose duck -like standing positions or forward positions according to your personal preference. No matter what kind of standing position you choose, your knees are in the direction of the fixed device as much as possible.Standing and practicing Japanese style is particularly safe).

The benefits of duck -like standing positions are easy to naturally squat, reduce the center of gravity, and improve stability, and on the other hand, it is easy to practice back.Standing forward, the knees are facing the direction of the fixed device, the sight naturally towards the head of the head, which is relatively more suitable for taxiing.

Third, the installation method of skiing single board fixed device

1. Comb with the posterior fixed device and snow rake together to form a flat connection.

2. Open the lock button of the front fixed device, enter the front fixer from the front of the slide and lock it.

3. Open the lock button of the fixed fixed device, part into the combination of snow rake and rear fixers from the slide rail, and lock it.

4. Find the size of the shell of the snow shoe, and adjust the position of the fixed fixed position before the shell size.

5. Step the snow shoes into the fixed device and try whether it is appropriate. The appropriate standard is to just hold the snow shoes, and the snow shoes will not shake.

6. Adjust the DIN value according to personal circumstances.

Disclaimer: The above method stems from the index of the program system or the sharing of netizens. It is for your reference only and does not represent the research perspective of this website. It proves that it is valid. Please pay attention to the authenticity and authority of the source of the content of the content.Apply to delete & gt; & gt; error correction & gt; & gt;