Articles in Tags balcony garden supplies

What is the general height of Outdoor Wall lamp installation?

Because the distance is determined by the effect of lighting, and the convenience of installation and maintenance is needed, the installation height of the general corridor and the Outdoor Wall lamp of general corridors and corridors should be slightly more than 1.8 meters high, which is about 2.2 to 2.6m from the ground.However, if you are on the workbench, you need to be about 1.5 meters away from the working horizontal line.

There are many models for Outdoor wall lamps, and different models of Outdoor wall lamps have different installation heights.The height of ordinary Outdoor Wall lights should be controlled between 1.7 meters-1.8 meters, and it should also be adjusted according to the actual situation.For example, a Wall lamp with a size of 180mm*160mm model, its installation height should be between 1.4-1.7 meters.The model with a model of 180*350mm, the installation height will be between 2.2 and 2.6 meters.

Method of the installation of Outdoor wall lamps

The Outdoor Wall lamp first needs to connect the wiring of the Wall lamp to use the connection that can be controlled by controlling the switch.The bright application line should be equipped with a pull -line switch and a dark application wiring. You need to choose a dark key switch.In addition, the switch of Outdoor wall lamps needs to ensure whether the operating tissue response of the switch is sensitive and light, and can it instantly achieve the effect of switching at will.

After the position and lighting of the Outdoor Wall lamp are determined, the first thing to install is the work of the Wall lamp. At the beginning, the method of using the embedded parts or punching is fixed.On the wall, try to work first.

precautions for the installation of Outdoor wall lamps

1. Outdoor Wall lights can be installed on the wall or on the pillars.When installed on the brick wall, you must raise wooden bricks or metal components when building walls. When installed lamps, fix the lamps on wooden bricks or metal components.The component may use the hug to fix the metal component on the pillar, and then put the Outdoor Wall lamp directly on the metal component.

2. The height of the bottom along the Outdoor Wall lamp is 1.8m. The height of the Outdoor Wall lamp device on all sides can be different, but the height of the Outdoor Wall lamp on the same wall needs to be common.

3. The structure of Outdoor wall lamps should be adapted to the environment of the device venue. The good choice of a closed switch. Because the Outdoor should often appear in rainy sun and sunburn.

4. Outdoor Wall lights should be selected from the type of switch according to the wiring method.In the open wiring, the pull -line switch should be selected, which is both economical and safe.The dark application line should be dependent on the wiring situation. If the dark wiring in the wall can be selected, the embedded dark key switch can be used.

5. The operation organization of the Outdoor Wall lamp switch should be sensitive and light, and its action is completed by the instantaneous conversion organization.In addition to the pull -line switch and dual -control switch, the connection and disconnection of the contact should be significantly marked.

6, Outdoor Wall lamp line switching lines should be used for insulation ropes, the length is not less than 1.5m, the line tissue and the pull rope should not fail for 1min with 98n force.

Outdoor Wall lamp classification

1. European Wall lamp

The European -style Wall lamp originated in the 1980s, mainly with the representative of the decorative application in the British royal family.It was not recommended to China in the early 1990s.It has not been applied in the domestic decoration industry in the past two years. It is mainly applied to the decorative engineering of star hotels, senior clubs, and villas to reflect the grace and luxury of the European aristocracy.

2. Rural Wall lamp

The entire room reflects a strong humanistic atmosphere, which complements the simplicity and nobleness.It makes the whole room feel very charming.

3. crystal Wall lamp

crystal Wall lights add a little aura to the current simple space, so young people usually prefer crystal wall lamps when buying Lights.Bright and gorgeous crystals give people a solemn and luxurious feeling.

4. Modern Wall lamp

Use a variety of bright flower elements to decorate the spring bedroom, and decorate an elegant arc Wall lamp on the bedside, making the spring bedroom more elegant and romantic.

1. Types without trace hooks

1. The suction cup type without trace hook

Using the physical effects of atmospheric pressure, the non -trace hook, this kind of non -trace hook is relatively simple, and strictly requires strict requirements on the surface, and there are two possible problems due to the relationship between time and thermal expansion and contraction: the adsorption is not tightly tightAnd should not be removed.

2. Adhesive gum -free hook

The advantages and disadvantages of the effect of chemical adhesion and a hook product produced mainly depends on the quality of the adhesive.However, if the stickiness is not high, the stickiness will not be firm. If the stickiness is very high, there will be viscosity residues left on the wall when removing.And because the adhesive -free hook hooks are hooks that produce effects in chemical effects, they are more sensitive to water and temperature. In the special environment of water vapor and temperature such as bathroom and kitchen, it is easy to produce and fall off.

3. Easy -to -use hook

Easy -to -use hook hooks also belong to a sticky glue -free hook. This type of sticky glue has two technical characteristics.

Technical features: The principle of sensory pressure adhesion.First of all, the viscosity of the easy -to -use adhesive tape is based on sensor pressure adhesive technology, that is, it is necessary to apply pressure to the glue strip slightly when used to make it more fully contact with the wall.Normal use (special attention to different load -bearing range of different gums), the sensitive rubber strips make the loader Hanging longer, but the tighter it will stick to.

Technical features: Elastic extension technology.Sensor sticky glue is designed to make the glue stick firmly on the wall, and the elastic extension technology is designed to make the rubber strip from being smoothly removed on the basis of the wall.When you want to remove the easy -to -use hook, as long as you gently stroke the ends of the back seat, stretch the adhesive bars down vertically. According to the principle of scissor distribution, the viscosity on the rubber strip will disappear instantly.

It is easy to solve the problems of the previous two types of non -trace hooks, which cannot be taken, and cannot be taken down. The non -trace storage is completely an act that is convenient for everyone to operate without becoming a project.But the disadvantage is that the operation steps are cumbersome and strict, and the operations are prone to fall off.

4. Moving without trace hook

Moving without trace hooks are a compound hook. Three working modes of sticky glue, friction, and atmospheric pressure are combined to become a kind of waterproof without marks, and the gravity of remote reuse (exemption of glue) is strong.The stains of the surface can also be water.It can be said that the mobility -free hook makes the storage more convenient and casual.

2. How to use without trace hooks

1. When preparing to use no trace hooks, first check the external packaging carefully. Generally,No trace hookThe way and steps of use will be explained in detail in detail.

2. Open the packaging, take out the traceless hook and no trace tape (special attention, the point is the non -trace tape).

3. Pay attention to the protection bar on both sides of the free waterproof rubber strip. The protective bar on one side is unveiled and the post is directly sticking to the back of the hook.(Do not unveil the other side for the time being).

4. Since the rubber strip is a waterproof rubber strip, the positioning position is also in a humid and high temperature environment such as bathroom or kitchen. If it is in the bathroom, please open the shower with the temperature of the bath water and rinse the wall with water.After the wall has a certain temperature, turn off the shower.Wipe dry the wall first, wipe the wall with the alcohol cotton strip attached to the package, and then dry it with a hair dryer.(This step is very important when installing waterproof glue).

5. Open the protective bar on the other side, and then stick to the wall directly on the wall.Remove the separate hook (the hook is pushed up and it can be removed, and the rubber strip and back plate are still sticking to the wall), and then press the back plate on the wall with your hand to make the rubber strip evenly stress.

6. Then hang it with no trace hook for 24 hours, so that the sticky glue can be used normally (please pay attention not to exceed the bearing bearing of the non -trace hook standard).

7. The process is relatively simple.Remove the hook (keep the back plate and the tape on the wall), stretch the rubber strip vertically, until the back plate falls off.

three,Pay attention to the use of no trace hook

1. Try not to exceed loading.

2. Let the rubber strip adapt to the environment before use (first use the water with a certain temperature to wet the wall, then dry it, and then wipe it with alcohol cotton strips and blow dry).

3. Press the pressure evenly.

4. When removing, pull down the vertically and pull down to prevent the rubber from being pulled off (if it is pulled, please use a hair dryer to blow the rubber strip, and then pick up a section to continue stretching).

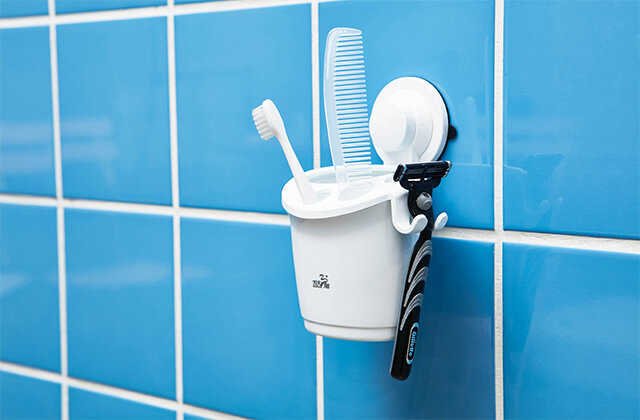
planting method of Artificial lawn

one,Sowing method

Most lawn can be sowed or sowed in spring or sowing seedlings in late autumn.When a lawn is established in large areas, sowing machines can be sowed, and small area sowing is used in small areas.After sowing, use a rake to rake each other, and then suppress it with a wooden cricket.After the granular seeds are planted, the straw should be covered.The sowing method requires skilled sowing technology to ensure uniform planting.In addition, management is more expensive.

Second, paving method

Although this method can quickly build a lawn, the process is too complex and the investment is large.

three,Stem

Forcetic straw species, such as Dogs, Carpet grass, fine leaves, creek cuts, bull grass, etc., can be reproduced with stems.It is best to do it when the grass Skin is germinated in early spring, or it can be carried out in the rainy season.First cut the stubs from the lawn floor and cut it on the shade of the shade5--8In a small section of centimeters, there must be a section on each paragraph, otherwise the new root cannot be germinated.Then broadcast or sprinkle.

Broadcasting: In a flat location, open shallow grooves with a small pick, pour foot water, and use the water to seep2-- 3The strip is a bouquet of the ditch, and the soil is covered on it1Centimeter, line spacing20Cm, spray water every day in the future1Second, after the new bud is unearthed, spray water.

Sprinkle: first pour the ground through the water through the water, seep the water, and then sprinkle the cut stems on the soil surface and cover it up.1Cm thick thin soil.

Four,Roots

This method is suitable for plants without stems and most of the grass species, such as sheep -bearded grass, velvet, etc.Time is best in early spring or rainy season.Shake off the soil after placing the root of the densely dense place, remove the weeds, cut off part of the whisker, so as to2-- 3The seedlings are a pinch, tear it open, and then planted or planted according to a certain plant distance.Follow the soil, cover the thickness of the soil2It is advisable to be about centimeters.Gently compacted after covering the soil, and fully irrigated.Before the new leaf germination, spray water every day1-- 2Second, to prevent the soil plate and crack.

Under normal circumstances, the method of planting turf is simple and easy to save funds.

What is the planting step of Artificial lawn

Step 1: finely neatly

The lawn has high requirements for soil conditions, and the land is required to be very flat before laying.

1Filling back to the soil is full and slightly higher than the design elevation. Generally, the height difference is3~5Within centimeters.

2, clean up the venue30cmAll small stones and other objects within the depth.

3If the grass design with terrain, be sure to ensure Smooth and full terrain.

Step 2: Soil improvement (sand spreads)

1, Sprinkle suction and humus soil, river sand, etc. to improve the soil

2, Roll the soil behind the river and sand with the wooden strips

In order to ensure the follow -up growth of the lawn, you can also sprinkle some compound Fertilizers appropriately. At the same time, the bottom Fertilizer should be applied to the entire land. Conditional regions can be applied to rotten Organic fertilizer, and chemical Fertilizers can be used.5Grace, potassium chlorine5gram

Step 3: Lawstins

1Before planting, the soil layer will be flattened

2When planting, it should be used to keep the lines, keep the lawn's flat, tidy, and uniform

Note that there are no gaps in the garbri babes. Generally, the specifications that are best selected are300*300mm

Step 4: crushing

1Generally, three crushing is required to ensure that the sand soil layer is fully contact with the turf

2There are many ways to crush: If the area of the turf is large, the drum can be used. If the area is average, it can make a roller, and the manpower can be pulled.If it is sporadic grassland, you can make the workers try hard with iron.
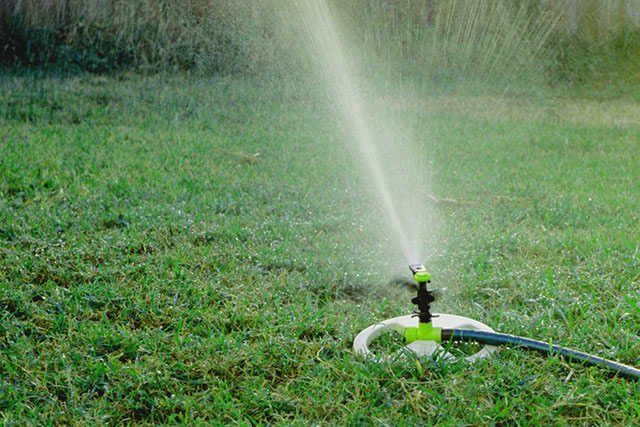
Step 5: Watering

1If there are large grasslands such as parks and golf grasslands, the automatic spray irrigation system is generally installed. Just open it immediately after the grass laid laid laid.

2If artificially irrigation, be sure to pay attention to the first watering, and consider the settlement of the soil, sand, and turf with sand.

Step 6: Daily Pruning

Generally, the grasslands just paved do not need to be grass, because after crushing and watering, the grass is tight.Need to pass10Began to get grass around the sky.If you encounter sporadic weeds, you need to clean up in time.

Step 7: Makes insulation measures

In winter to promote the germination of the lawn, the lawn can be used to keep the lawn with non -woven fabric (breathable insulation).The film is used to keep the insulation without good breathability, and it should be removed regularly.

How to plant a beautiful lawn for lawn seeds

First, clean up all weeds in the planting area, previous grass, and other debris.

The chemical treatment method is: spray glyphosate to kill all plants in the area (if necessary).These toxins (glyphosate) may have a long -lasting effect on the soil.Properly flip the soil, so that the soil and weeds can be loose, which is conducive to collecting these weeds.If you have time, you can let the land idle for a week and water the land appropriately.This is a good way, because after this time, the weeds under the ground unearthed, so that you can remove them before planting the lawn.

Second, let the soil fully contact the air and soften it.

You can use hoe, plow or shovel to turn the soil. What tools are used depending on the size of the land.Before planting the lawn, you can pile up the soil (so that the soil can be improved).

three,Since the weeds on this land have been cleared and the soil has been turned over, the next thing to do is to make appropriate grades.

This can ensure that there is a certain small slope between the lawn and the infrastructure of the house, at least every10foot(3Mi) Reserve1inch(2.5The height of cm).

Fourth, when turning the soil, a large amount of weed seeds will be turned to the surface of the soil, and these seeds will germinate and compete with the newly planted grass.

Watering the soil before sowing (weekly1-2Times), and then spray the pesticide again, remove all weeds, so that no other plants will compete with new grass.

Fifth, apply small seedlings and sprinkle lime.

Fertilize the grass according to the guidance (control ratio) on the Fertilizer packaging.It may be a good way to use the Fertilizer, because it can ensure the accuracy of fertilization.Lime is prepared for acidic soil (acidic soil is widely distributed in the northeast region).Especially when there is an evergreen tree or shrub in the planting area, you can conclude that these soils are acidic soil.If you really want to determine the nature of the soil, you can get the soil sample to the local cooperative office to test it.If you have improved the soil and the soil is good, then you don't need to sprinkle import Fertilizer.

6. Type the soil as much as possible.

planting lawns on soft soil is not a good idea.You can use hand ramming or other things to rectify the soil. What tools are used depends on the size of the land area.If you fall down a lot of soil, then you are better to layered them and fight them.actually,13-15The soil with deep centimeters is not thick.If you want your lawn to grow all year round, then you must pay attention to these things.When rammed soil, using water rollers is not a good way. If necessary, it is best to use the rammer.

Seven, the surface of the land needs to be rough.

Use the dumplings to make the soil surface slightly rough.You need to leave some gaps to take root.

Eight, sowing.

Use an appropriate seeding machine and sow according to the proposed proportion prompting on the seed packaging bag.It's not good to sow too many seedsThe this will not make the lawn grow faster. On the contrary, this will cause the lawn to be crowded, which will cause the grass to suffocate and die.

Nine, make sure the seeds and soil are fully contact.

At this time, you can use water rollers to stuff the seeds into the hole (loose place) of the soil surface.Or, you can also use garden .Don't worry that most seeds will be exposed to the air because it is a good thing.

Ten, sprinkle peat soil or Fertilizer.

The peat soil or Fertilizer can be used as the protective layer of the seeds, and the other is to be used as a cover.If you want to spread a thin layer of coverage for the seeds, then use some container to make these things.You only need to bury the seeds into the soil until you can't see them.Too much peat soil will not hurt the seeds, but this is a waste.You only need to sprinkle a thin layer (until you can't see the soil).This step is very time -consuming, but this is very important.The coverage can play an important role in maintaining soil moisture. Do not water all the times a day (if you are lucky, you can once a day).If you don't buy toxic Fertilizers, fertilization can improve the soil, so that the soil becomes fertile.

Eleven, watering.

When watering for the first time, be sure to pour it thoroughly (ensuring that each area can be poured), which is very important.But don't pour too much water (don't make the floods).You have to water constantly, a small amount.After dampness (contact with water), the peat soil will show dark brown.The most important thing is not to leave any stagnant water.At the same time, the peat soil and soil must be fully absorbed, that is, at the beginning, you have to pour sufficient water.

12. Make sure to keep watering in the planting area.

Another advantage of peat soil is that through the color changes of peat soil, you can easily know when you need to water.When the peat soil becomes dry, its color will become light brown again, so you can knowIt is water.After watering, the peat soil will become wet, and its color will become dark brown.Ideally, the color of peat soil should always be dark brown (in other words, peat soil is wet).But the more practical approach is to pour water once before going to work, and then pour the water once after going home from get off work.If the peat soil does not dry, then you don't have to rush to water!Anyway, the color of peat soil is the signal indicator of watering.

13. Don't postpone the time of pruning the lawn for the first time.

The delayed trimming lawn will cause greater damage to the lawn.Once the new lawn reaches a trimming height or slightly exceeds this height, then you have to perform the first pruning.Generally speaking, the trimming height is probably6arrive8inch(15-20centimeter).Perhaps, when the first trimming time comes, your lawn still looks fragile.But the appearance is deceived.Just start your grass cutting machine on the lawn, don't worry about it crushing your lawn, because the grass is very flexible!If you let the lawn grow too long, then when you trim, they will be pressed down, and then the grass is cut off.So don't be afraid, as long as the grass is long enough, you have to risk cutting it off.

1. How to use Solar lamps

According to the principle of Solar lamps, Solar lamps are powered on during the day and light at night.The specific Solar Lamp working principle is simple. For Solar cells made of photocopyral effect principle, Solar panels during the day receive Solar radiation energy and convert them into electrical energy output. The charging controller is stored in the battery.The left and right, the voltage of the opening of the Solar cell board is about 4.5V. The charging controller detects the voltage value after the voltage value is detected, and the battery discharges the lamp head.After the battery is discharged for 8.5h, the charging and discharge control action is over, and the battery discharge is over.The main function of the charging controller is to protect the battery.

2. How to install Solar lamps

So how to install Solar lights by yourself?The method of installing Solar lamps is very simple. Just choose the right position and install it directly. The specific steps are as follows:

1. First choose Solar silicon boards.Select the size of the Solar panel according to the area or brightness requirements.

2. Then configure Solar lamps.Generally, it is better to choose LED lights. It uses low voltage, small current, and good light emitting effect.Compared with energy saving.It is recommended to choose a Solar Lamp with a special battery.

3. In terms of installation, the Solar panel is installed outdoors, and the sunlight should be received.The time to install the sunlight also determines the effect of the Lights.

4. When installing Solar panels, pay attention to waterproof, and try to install it at a high place, so that rainwater should not be soaked.

5. Share a small tip here is to place a thin transparent ordinary glass on the Solar board.This prevents the rain from getting wet directly and can effectively block the sun.Extend the service life of Solar panels.

What is the general height of the Wall lamp in different positions?

1. General Wall lamp installation height, that is, 2240 ~ 2650mm from the ground.The Wall lamp in the bedroom is closer to the ground, about 1400 to 1700mm.The distance from the Wall light to the wall is about 95-400mm.

2. The height of the Wall lamp in the corridor and the corridor should be slightly more than 1.8 meters high, that is, 2.2 to 2.6m from the ground.

3. If the Wall lamp in the working environment is 1.4 to 1.8m from the desktop, the Wall lamp on the bedside bedside is about 1.4 to 1.7m.

4. The distance of the Wall light is about 0.09 to 0.4m.

Where is it suitable for installing Wall lights

1. bedside

Because it is auxiliary lighting, the bedroom bedside needs the help of wall lamps, because the bedroom generally needs auxiliary lighting decoration. The Wall lamp installed on the bedside, it is best to choose the light head to adjust the direction.The style of the Wall lamp should be considered to echo the bedding or curtains in order to achieve a better decorative effect.

2. Corridor or living room

In addition to the bedroom requires auxiliary lighting, the general living room and the aisle are also needed to be used for assistance lighting. The lamps in these places should generally be soft, and the installation height should be slightly higher than the horizontal line. It is best to match it when used in use.Some other decorative objects, such as: an oil painting, a vase with flower arrangement, or a wall frame displayed by a artwork, etc., the effect of decoration is more delicate.

3. Before the mirror

In addition to the two spaces require Wall lamp for assistance lighting, the Mirror front light in the bathroom space can also be selected for installation. The Wall lamp installed in front of the bathroom mirror is generally installed above the toilet mirror.The style of the style can be considered to echo the handle of the faucet or the bathroom cabinet.

4. Restaurant

For small apartment types, in terms of lighting, only local lighting is often required to create a comfortable feeling. For example, a small apartment restaurant, if you choose a chandelier to decorate, the light may be too bright and dazzling, and the Hanging downThe Hanging chandelier will make the compact space more crowded, and choosing one or two restaurant wall style and color -shaped wall lamps to decorate will make some decorative scenery.When choosing a Wall lamp, you should pay attention to matching the color of the wall. It is best not to choose the color of a color system with the wall. Use some contrasting color wall lamps to sometimes have a good effect.

What are the installation steps of the Wall lamp?

1. Determine the installation location

First of all, we must determine the installation position of the Wall light on the wall, and generally determine the specific location according to the differences in functional space.For example, the bedside bedside lamp is usually between 1400 mm and 1700 mm from the ground height, while wall lamps such as balcony and aisle are often higher than that of human vision, about 1.8 meters.In fact, there is no specific restrictions on the height. Everyone can determine the installation location according to their actual situation.

2. Tag number on the wall

The position of the Wall lamp is mainly determined the position of the Wall lamp seat. When you are determined, you must make a mark on the wall and draw the holes on the Wall lamp Hanging plate to facilitate the expansion screws.

3. Use electric drill drilling

Before drilling, you should understand your own line layout diagram to avoid hitting the wires when drilling, and then use the electric drill to punch the marked mark. At the same time, pay attention to the depth of the drilling.Generally, it is advisable to not exceed the length of the expansion screw.

4, upper expansion screw

After playing the holes, insert the expansion screws into the hole, and use the hammer to hit the expansion screws into it until it does not enter the wall.

5. Install Wall lamp Hanging board

Install the Wall lamp Hanging board, fix it on the expansion screws with screws, and pay attention to the alternation of both sides when screwing, which can prevent the screw from shift and keep the Wall lamp Hanging on the level and not skew.

6. Install the lamp body

First install the Hanging panel and the suction plate with screws, tighten and fix, then disconnect the power, connect the wire of the Wall light with the power cord, and finally install the lamp body.Pay attention to check immediately after the installation is completed to see if it can be used normally.

Disclaimer: The above method stems from the index of the program system or the sharing of netizens. It is for your reference only and does not represent the research perspective of this website. It proves that it is effective. Please pay attention to the authenticity and authority of the source of the content of the content.Apply to delete & gt; & gt;Correction & gt; & gt;