Sys_Zhen's Articles

The storage method of down sleeping bag

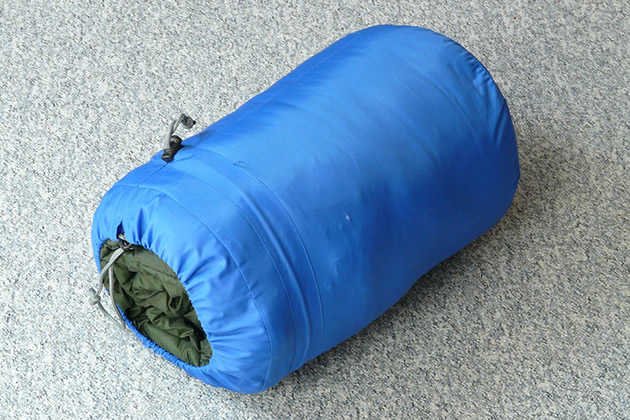
After waking up Outdoor wild camps, you can store the down sleeping bag.First of all, the air in the down sleeping bag is fully released, which is not only conducive to not bloated during folding, but also plays a certain role in maintaining the down sleeping bag.

After confirming that the air of the down sleeping bag was dry, spread it flat on the ground, and then folded away from the tail.Hold both hands on both sides, and slowly put away along the front part of the sleeping bag.From the beginning, it has to be tightened, otherwise it is rolled behind, but it is getting more and more drum.

When you reach the head, press the rolled down sleeping bag with both hands, and then tie the strap on the sleeping bag.Put it in the packaging bag, or put it above the Backpack.It is best to wrap the bag first, so that it is not easy to be affected by the environmental climate and will not damage its temperature mark.After doing these three steps, a huge down sleeping bag became a small binding quilt on our Backpack.This kind of folding method can save the largest storage space.After all, when we trek outdoors, the less Outdoor equipment and size, the better.

How to correctly keep the down sleeping bag

1. Like many clothing, the down sleeping bag should not be baked. If there is a need to cook in the wild when Camping in the wild, be sure to move the sleeping bag to the distance to avoid contact with the flame.

2. When cleaning the down sleeping bag, it is strictly forbidden to use a strong detergent. When used, it can be used with cotton Sleeping bags, and the life will be longer.

3. Plel Sleeping bags should not be in the compressed bag for a long time. If there are conditions, they should often flip the down sleeping bag and save as much as possible in a loose and free state to avoid the knot.

4. In the use of Sleeping bags, you should pay attention to keeping dry. Because the degree of warmth of the down sleeping bag is greatly reduced, the Backpack should be protected to avoid water in the rain in heavy rain or water.

5. When not in use, put it in a dedicated storage bag, put it in a cool and ventilated and dry place to prevent mold and smelly.

6. Do not need to clean the down sleeping bag frequently, and the frequent washing of the transition will damage the down material of the sleeping bag. Therefore, please minimize the number of washing times while keeping cleaning.

7. When Camping in the wild, after getting up in the morning, you can turn the sleeping bag out of the morning and place it on the top of the Tent or dry, ventilated, and sunlight.

8. The down of the down sleeping bag fabric has a waterproof or waterproof function, but if the weather is extremely humid on the way, please seal the sleeping bag with a plastic bag to avoid humid air into the sleeping bag.

Disclaimer: The above method stems from the index of the program system or the sharing of netizens. It is for your reference only and does not represent the research perspective of this website. It proves that it is valid. Please pay attention to the authenticity and authority of the source of the content of the content.Apply to delete & gt; & gt; error correction & gt; & gt;

1. How long is the life of Solar street lights

As an environmentally friendly and energy -saving street light, Solar street lights are more concerned about the service life. So how long can Solar street lights be used?

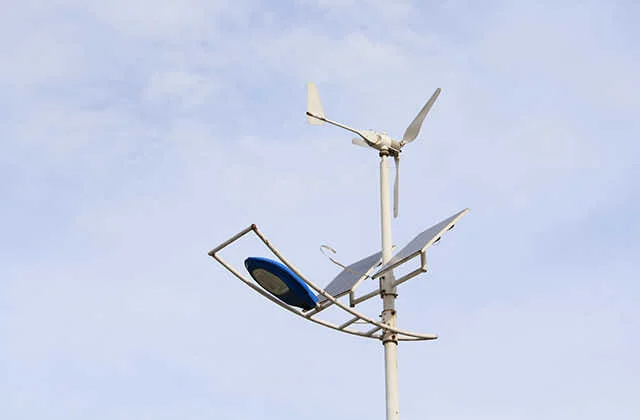
Generally speaking, the life of Solar street lights is related to its accessories. The accessories of Solar street lights mainly include Solar panels, controllers, batteries, light sources, and light rods. The service life of different accessories will be different:

1. The service life of Solar panels is more than 20 years. After 20 years, Solar panels only have a certain light aging (about 30%), but it can be continued.

2. Then the controller, the general service life is about 8-10 years, depending on the original electronic original and use environment.

3. Next is a battery. In the past, Solar street lights generally use lead -acid colloid batteries. The service life of this battery is about 3 years. Generally, lead -acid batteries that are about to years may be very serious.If you can't meet it, you can't meet the demand for lighting.And now the battery is mostly used in lithium batteries. The high -low temperature attributes of lithium batteries are better than lead -acid colloid batteries. The number of cycles is more than lead -acid colloid batteries. The deep discharge energy is more than 2,000 times.More than 5 years.

4. In terms of light sources, the current Solar street lights are LED light sources. The good LED light source life can reach more than 11 years.

5. The service life of the light rod is relatively long. If it is used with hot -dip galvanized and rust -proof measures, the life span can be more than 20 years.

In summary, the main factor restricting the life of Solar street lights is the battery. Under normal circumstances, the life span of Solar street lights is 5-8 years, but most accessories can be used normally. Just replace the battery.

2. How to extend the life of Solar street lights

solar energy is a kind of green renewable energy, and it is also more energy -saving. Now many places use Solar street lights.The use of Solar street lights is limited. If you want to extend your life, the main point is to pay attention to the following points:

1. Use high -quality Solar panels

The main function of Solar panels is to collect light sources and convert light energy to electrical energy. The life of the Solar panels produced by regular manufacturers is relatively long. When buying, you should pay attention to the purchase of products with guaranteed quality.

2. Choose a light source with good heat dissipation

There are two positions that require heat dissipation in Solar street lights, one is the head of the lamp, and the other is the battery.Solar street lamps are generally used for LED lamp heads. We should buy a good cooling function lamp, so as to extend the life of LED lamp beads.

3. Use high -quality batteries

The battery is a strong backing of Solar street lights. If the battery life is not long, the service life of Solar street lights will not be long.Generally speaking, it is best to heat the heat dissipation effect that the lithium battery with aluminum -magnesium alloy shell has long life, fast heat dissipation, and the quality is very guaranteed.

4. Choose the right Solar street light controller

Solar street light controller is a central nervous system in the Solar lighting system, which is responsible for coordinating the work of Solar panels, lithium batteries and loads.It is the key component of the Solar street light lighting system. We must not be greedy for cheap controllers. It is recommended to choose a reputable manufacturer and buy a controller with a qualified certificate.

5. The process processing of the light rod

Solar street lights are mainly supported by light rods. The service life of the street light rod depends entirely on what kind of galvanized use. Cold galvanized Lights will rust after 1-2 months outdoors.Hidden dangers; good Solar street lights are hot -dip galvanized, and the service life can reach 20 years.

1. What facilities and equipment do hydroponic vegetables need

The cultivation and planting of hydroponic vegetables are usually carried out in the greenhouse.In order to ensure the normal and healthy growth of vegetables, light adjustment facilities, ventilation facilities, and temperature and humidity adjustment facilities must be provided in the greenhouse greenhouse.Anti -insects are also hung in summer to prevent insect pests.

The composition of hydroponic facilities and equipment is composed of nutritional solution grooves, seedling equipment, cultivation pools and cultivation plates, liquid adding systems, drainage systems, circular systems, etc.

1. Nutritional tank

Nutritional solution grooves are used to store nutrients. Generally, bricks and cement are made into water sinks.The specific width of the nutritional groove can be flexibly designed according to the greenhouse terrain.

2. seedling equipment

The seedling equipment is used to sow and seedlings, consisting of seedlings and breeding matrix.The seedlings are mostly made of plastic with flat bottoms without leakage. The plate is 60 cm, 30 cm wide, and 3 cm high.The breeding matrix can choose a sponge block or a degradable rock wool block with a large porosity.

3. Cultivation pool and cultivation board

The cultivation pool is the main site of vegetable growth and the main part of hydroponic facilities.vegetables are planted on the cultivation board and placed in the cultivation pool.The root of the vegetables obtains moisture, nutrients, and oxygen from the nutrient solution in the pool, thereby meeting the physiological needs of normal growth.

The cultivation pool is generally made of cement, and its shape and size are different depending on the types of different vegetables. The cultivation ponds for cultivation of leafy dishes are generally large, up to 100 meters long, up to tens of meters wide, and the specific size will be.Depending on the area of the greenhouse.The cultivation pool of fruit dishes is generally smaller, with a length of 3 meters and a width of 1.5 meters.Both cultivation pools are rectangular, and the pool depth requires 30 cm.In addition, the cultivation pond also has ditch types and pipeline types, but these two cultivation pools are mostly used for small -scale production and viewing purposes.

The cultivation board is also known as the implant plate. It is used to fix the root of vegetables to prevent dust invasion, cover the light of light, and prevent the algae from generating and maintaining the temperature of the nutrient solution in the pool.The cultivation board is generally made of polystyrazene board. According to the types of vegetables and the needs of different growth periods, their specifications and sizes are also different. Generally, they are 80 to 100 cm, 50 to 70 cm wide, and 3 cm thick.The planted pores with a diameter of 3 cm are divided into 288 pores, 99 -hole boards, 72 -hole boards, 24 -hole boards, 18 -hole boards, 6 -hole boards, etc. according to the hole distance.

4. Add liquid, drainage system and nutritional fluid circulation system

The governance of hydroponic facilities is generally pumped into the cultivation pool by the pump.The pool is kept 5 to 8 cm deep water Levels, and the facilities that cultivate the pond adding liquid are composed of iron or plastic -made liquid addresses and plastic -made liquid support.

The nutrient solution was pulled out of the pump from the nutritional groove, and the liquid coefficient and the liquid branch Tube entered the cultivation pond, which was absorbed by the root of the vegetables.The nutrient solution higher than the ductal is flowing back to the nutritional groove through the drainage groove to complete a cycle.

2. Homemade hydroponic vegetable planting equipment

Materials: PVC water pipe diameter 110 series, diameter 75 series, 50 series diameter, 110 rpm 75 supplement core, 75 ride 50 supplement core, 110 corners

Bend, 50 corner bend, PVC glue, a bucket or water tank above 30L, a submersible pump (over 2.5 meters), silicone Tube, throat hoop, throat,, throat,, throat,

Timing plug.

tools: saw, electric diamond, open -hole, tape measure, marking pen

Production process:

1. The place where the hydroponic pipeline is placed must be sufficient, and it is best to facing south.Observe the light situation and place hydroponic pipelines in places suitable for planting.There are many forms of hydroponic equipment, including newspaper shelves and box hydroponic devices. Although the structure is different, the principle is that the root system of plants extends into the water to absorb nutrient solution.The root of the plant in the system.Some special plants, such as: the roots of water spinach and green dill are not high in the oxygen content in the nutrient solution, and can also be cultivated by static water.But in general, the flowing nutrients are better, suitable for most vegetables and plants.

2. You can find a lot of hydroponic equipment on Taobao and choose the appropriate direct order.But if you want a set of hydroponic systems that are suitable for your own, you can only DIY.Measure the size and calculate the length of the PVC pipeline you need to purchase the material.It is recommended to use a PVC Tube with a diameter of 110mm. In addition to planting vegetables with leafy vegetables, it can also be used to plant eggplant vegetables such as Pepper, tomato, okra, and strawberries.Even in the 110 pipes, the developed fruits and fruits of Cucumber and loofah have succeeded.The pipelines with a diameter of 75mm are only suitable for planting leafy vegetables, such as lettuce, cabbage, spinach, coriander, etc.

3. When designing, pay attention to the 110 pipes and finally convert it into a 50 Tube with two times. The planting pipes are connected with a 50 -sized Tube.This is to retain a certain depth nutrient solution in the planting pipe, so that the root system of the plant is always soaked in the nutrient solution.If you use only one time to make the core from 110 to 75 sizes, it will only be less nutrients staying in the pipeline. When the root system of the plant is underdeveloped in the early stage, it may not be a liquid surface.The entire hydroponic pipeline should form a circular system.The submersible pump in the bucket pumps the nutrient solution to the water inlet, and the overflowing port will circulate a circle of nutrients and then flow back to the bucket.When designing, it is necessary to consider factors such as the direction of the water flow, the level of the level, the flow, and the low -level pipelines overflowing.4. Measted the size of the pipeline, and after the material is good, use an electric drill and add a hole to drill the pores of the planting basket on the pipe.The size of the opening device is determined according to the size of the planting basket.The previous spacing of each planting hole is 20cm, which can meet the growth requirements of most vegetables.You can adjust the hole distance to 10cm, so that a lot of space can be saved during the seedling period. After the vegetables grow up, the middle vegetable seedlings will be kept at a reasonable distance.5. Pipes and accessories that are meticulous with the size of the size are bonded with PVC glue. Pay attention to as much glue as much as possible to avoid leakage.After sticking to it, you can test the water 24 hours. Observe whether the water flow is normal, and whether there is water leakage and overflow.If the design is reasonable and the construction is carefully, there should not be too much problems in testing water.

6. After the water test is successful, you can add a timer to the power supply of the submersible pump.Because plants do not need too much oxygen at night, they can be set to work for the diving pump from 7 am to 7 days in the evening. After 7 o'clock in the evening, it can be circulated once a hour and a cycle for 10 minutes.
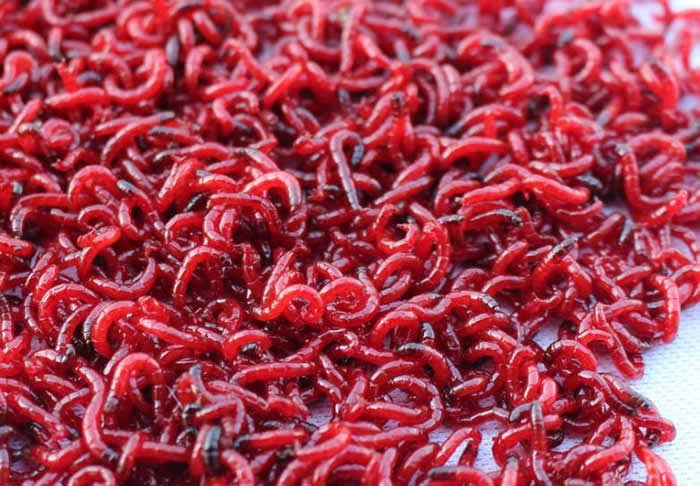
How to raise red worms

1. Breeding conditions

When breeding red worms, prepare a glassware, then put the selected red worms into it, and then inject clean and sterile natural water. If you want to use tap water, it is best to place tap water in the sun 2-3God, remove the chlorine gas in it to prevent red insects from growing poorly.

2. Control light source

The growth of red worms is inseparable from light. Lack of light sources can cause red worms to breathe and suffocate death. It is best to hang a 5 -watt Light bulb above the container to provide adequate light irradiation to the red worm to make them free.Breathing, healthy growth.

3. Water quality regulation

In the process of breeding red worms, you need to replace the water once a day to keep the water clean. In the process of changing water, clean the red worms and containers to clean the mucus to avoid breeding bacteria. It is best to control the depth of the breeding water.About 3-5 cm, deepen the water level at night, playing a warmth.

4. Feeding bait

Red worms mainly eat Organic fertilizer, and like some sour, sweet feed.In general, you need to be fed once every three days.You can use rice bran, sludge, pigeon dung, sawdust and other fermentation into feed.

5. Breeding management

Natural air flow should be performed in the breeding venue, and it can be exposed to the air, which can effectively improve the oxygen content.When the temperature is too high, you can use some artificial methods to increase the oxygen content of the breeding venue. When the temperature is below zero, frozen phenomenon will occur.At this time, they are easily frozen to death. They can use some other warm measures to reduce the icing of the water surface so that they can effectively grow them.

How to save time for red worms

1. Pick up insects

First, the bugs I bought are as much as I have just entered, so that they can be fed for a long time and can not die for a long time.

2, density

The density of insects should not be too large. If the density of the bugs is high, it is easy to die. Generally, it is raised with one to two or two cm stainless steel pots. The density is just right and the water is basically full.

3. Change water

The water needs to be changed every day, and placed in a cold place. If there is no cold place, place it in the shade window sill near the window.board, this can be insulated. It is best to keep the water of the red worm. The water temperature in the water in the pot is close, and the worm is easier to live.

4. Wash

The first is to wash the pot. After changing the red worm into the sieve every time the water is changed, the basin must be washed with water. At this time, some of the pots will be stained on it.Go down, rinse the pot. The second is to wash the insects, connect the water from the pot, and rinse the bugs in the sieve with water with water, and the mucus and dirty things on the insects.

5. Others

Pick out the dead bugs before changing the water or before changing the water to ensure that there is no blood water in the water polluting the water.

Running marathon and off -road Running are two very different experiences. The former track is more stable and the latter is more challenging.Various equipment.Of course, there are many differences between the two. For most people, the most direct difference may be on buying running shoes.

Ordinary running shoes

From the perspective of the outsole, the outsole is generally covered with the entire sole, which is covered with a variety of special patterns. There may be many grooves in the middle. Most of the colors are black and other colors.3-5mm EssenceThe main function of the outsole is to play a wear -resistant and non -slip effect during the direct contact with the ground.The outsole material is generally carbon -containing rubber. This rubber is more wear -resistant, and the anti -slip effect and weight are also ideal.

Off -road running shoes

Cross -country running shoes are shoes specifically for off -road competitions and training, with weight between ordinary running shoes and hiking shoes.Compared with ordinary running shoes, it pays more attention to protection. For example, the soles are designed for different terrain design, such as gravel pavement, mud roads and other roads. useTPU Inject the toe to prevent the toe from being hit by rocks, etc.; the upper is more tough to prevent being scratched. Some styles even provide GTX waterproof coating; the shoelaces will use a fast shoelace system or a shoelaces to collect Bags. This is mainly to prevent the lace from being hung up.

Hiking shoe

The rigidity and abrasion resistance of the soles of the shoe shoe is very good.For off -road running shoes and hiking shoes, hiking shoes have low gangs, medium gangs, high -top models, and various types have their own advantages.The low -end models can be designed for a large stride. Generally, the sole is soft and there is no side support.Self -heavy, the price is relatively low, it is very suitable for a small load, walking on a flat rural road or mountain road; and the middle gang's shoes are wrapped in the ankle, the sole design is more abrasion, the rigidity is greater, but it can be bent vertically to adapt to adaptationWalking for a long time.The shoe has a protective effect on the ankle and can reduce the impact on the ankle. For high -gang hiking shoes, it is suitable for the steeper and more complicated terrain of the route. The shoe help can protect the ankle well.Powerful supporting effects, in addition, the waterproof performance of the shoe will be much better.

Off -road shoes As well as running shoes As well as Hiking shoe What is the difference between the three

1 , running shoes are only suitable for us to wear, run, and exercise. If we want to run a marathon or small load in the wild for a long time, we can choose off -road shoes.It is more appropriate to choose hiking shoes if the terrain is complicated and rugged or long -distance.

2. Off -road running shoes are suitable for walking and Running on non -cement land, while hiking shoes are suitable for complex terrain such as cement land, mountain roads, and Skate landforms;

3. The off -road running shoes are well supported. The supporting shoes were supported by the off -road shoes, especially the low -top and middle -gang shoes;

4. Off -road running shoes are suitable for small load -bearing Running, and hiking shoes can't do this.Suitable for high negative hiking shoes is not suitable for Running, otherwise it is easy to cause typhoid fever to the feet, such as bubbles.

In any case, there are still differences between off -road running shoes and hiking shoes and running shoes.In actual purchase, we need to choose off -road running shoes and hiking shoes in combination with different situations, and will receive more effective results.