Articles in Tags ski resort

1. What is a Ski board fixed device

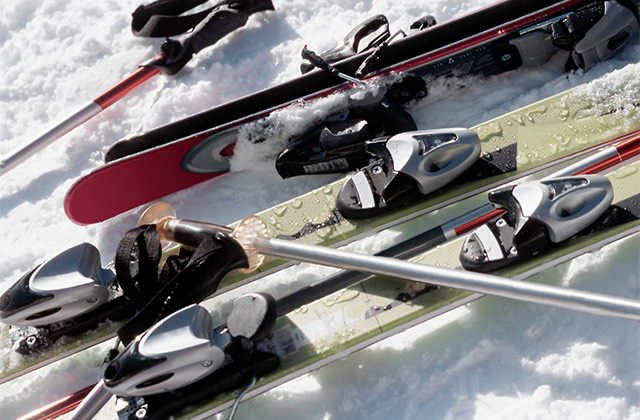
The fixed device is an important part of connecting skiing boards and Ski boots, which plays an important protective role in the personal safety of the Ski.The fixed device is divided into two parts, and the screws are fixed on the skiing plate directly. The front fixed device cannot be moved. The rear fixed device can move along the Ski board to adapt to the Ski boots of different sizes.

2. How to choose the angle of the single board fixed device

The angle of the single board fixed device is selected to adjust according to the type of the Skiboard veneer used in the position and used:

1. Choose according to the position

(1) Takayama Station

It is used for racing narrow boards, one -way gliding (the tail is Square), hard shoes, the angle of the front and rear feet fixers is between 35 degrees and 70 degrees.Generally, the anterior foot angle is 5 degrees larger than the rear anon to maintain the good control of the board when the small curve is maintained.

(2) Ahead

Freedom or chase boards are commonly used.The front fixed angle is 15 degrees to 40 degrees, and the posterior fixed angle is 0 degrees to 30 degrees.From the perspective of human structure, the angle difference between the front and rear fixers should not exceed 21 degrees.A commonly used mountain sliding angle configuration is 6 degrees after the first 21 degrees. If you like to slip, you can choose the first 30 degrees and 15 degrees.
(3) Duck standing position

The angle configuration of the common fixed device in the domestic ski resort is generally 0 ~ 30 degrees of the front fixers, and the rear fixers -1 ~ -20 degrees.Under this position, when you stand naturally, the front and rear knees are facing the head and the tail of the plate, and the shoulders are parallel.From the perspective of human structure, the angle difference between the front and rear fixers should start at least 10 degrees. The common configuration is the first 18 and the rear -6, or the front 15 and 15.

2. Select according to the type of Skiboard

(1) Running board (hard shoe plate)

The racing board is relatively narrow, and the angle has a lot to do with the size of the shoes.The general selection principle is to set first and then fixor angle: let the toes go out a little bit, and the heel has just fallen on the blade, so that it is convenient to put pressure on the board blade.As for the angle of the front fixed device, you can start from the perspective of the fixed fixed device 8 degrees. You can feel, adjust, and select the most comfortable configuration.

For the racing board, the angle of the fixed device is too small means that the body needs to be twisted significantly when doing large smoothness.(This sentence is not loyal to the original text.If the angle of the fixed device is too large, the carving blade is fine, but it is more difficult to control in the case of small bend or even medium.

(2) Free board or chasing board (soft shoe plate)

You can choose duck -like standing positions or forward positions according to your personal preference. No matter what kind of standing position you choose, your knees are in the direction of the fixed device as much as possible.Standing and practicing Japanese style is particularly safe).

The benefits of duck -like standing positions are easy to naturally squat, reduce the center of gravity, and improve stability, and on the other hand, it is easy to practice back.Standing forward, the knees are facing the direction of the fixed device, the sight naturally towards the head of the head, which is relatively more suitable for taxiing.

Third, the installation method of skiing single board fixed device

1. Comb with the posterior fixed device and snow rake together to form a flat connection.

2. Open the lock button of the front fixed device, enter the front fixer from the front of the slide and lock it.

3. Open the lock button of the fixed fixed device, part into the combination of snow rake and rear fixers from the slide rail, and lock it.

4. Find the size of the shell of the snow shoe, and adjust the position of the fixed fixed position before the shell size.

5. Step the snow shoes into the fixed device and try whether it is appropriate. The appropriate standard is to just hold the snow shoes, and the snow shoes will not shake.

6. Adjust the DIN value according to personal circumstances.

Disclaimer: The above method stems from the index of the program system or the sharing of netizens. It is for your reference only and does not represent the research perspective of this website. It proves that it is valid. Please pay attention to the authenticity and authority of the source of the content of the content.Apply to delete & gt; & gt; error correction & gt; & gt;

1. Whether Ski shoes are directly worn or packed with shoes

1. Skiper is directly worn, and there is no need to put it outside other shoes, otherwise it will affect its comfort.

2. When designing, Ski shoes takes into account the three attributes of ordinary shoes, waterproof shoes, and skiing equipment. It has both the routine wearing effect of ordinary shoes and a strong waterproof effect. At the same time, it can be perfectly matched with the Skiboard.Put it directly after the socks, instead of wearing other shoes.

How to wear Ski shoes

1. First move the plastic behind the shoe, and then hold the buckle on the side of the shoe with your thumb, and fix the shoe band from the buckle.

2. Cut the front and rear shoes, stretch your feet in and put on, put on the shoes, and step on the ground with your feet.

3. From the front of the shoe, the clip is tightened in turn, and the tightness should be moderate. After standing up, there should be no feeling of too tight and looseness. If there is too tight or loose, you can adjust it appropriately.The ankle joint can only perform small exercise.

4. Put the skiing board in the place, insert the tip of the shoe into the card slot first, and put it on the heel on the position of the heel.If it is not appropriate, you can call the service staff of the ski resort to help you adjust it.

3. What should be paid attention to when wearing Ski shoes

1. What are the precautions for Ski shoes?In addition to the tightness of the competition, in addition to the clip adjustment, you can also use the shoe device to fine -tune the fat, long, length and the inclination of the waist.

2. The laces of Ski shoes are not too fancy. You can use two conventional ties. One is to pass through the last two holes of the Ski shoes and pass through the corresponding hole in turn.tie.The other is to pass through the corresponding holes at the bottom of the Ski shoes, and then pass through the holes above the oblique.

3. Skiper locks must be tightened step by step, so that your feet need to be adapted slowly, and the lock also requires the overall adjustment of tightness. Do not lock the most.Every time you step up the lock, you need to adjust the position of the tongue of the inner lime, don't pinch the meat to avoid hurting your feet.

4. Skiper locks are not tighter, the better, the standard is tight but not painful.The tighter the lock, the heel the shoes are heeling.Although the delay and loss in the ski resort have become smaller, the feet will be uncomfortable at the same time, it is easy to squeeze blood, or even injury, and it is not suitable for long -term wear.

5. The No. 4 buckle of Ski shoes is the middle lock, which needs to be fastened at the end, because if 2 and 3 do not buckle well, the 4 buckle is very strenuous and the buckle is not tight.Among them, No. 2 and 4 locks are the most important. They are responsible for fixing the heels and avoiding snow shoes from getting off their feet.The degree of loosening of the lock, everyone feels different, it is not good to uniform standards.

1. The importance of snowboard waxing

Snow plate wax is a wax that can adapt to a specific environmental temperature.When the snowboard is gliding, the bottom of the plate and snow are constantly rubbing, and the heat generated by friction will melt a small amount of snow, which formed a thin water layer between the bottom of the plate and the snow surface.If there is no wax layer protection at the bottom of the snowboard, the melted snow will penetrate into the bottom of the plate, causing damage to the snowboard.

Snow plate waxing is the most important part of the snowboard maintenance process.Waxing for the snowboard can enable you to enjoy the pleasure and random turn of skiing.At the same time, it will reduce the risk of damage to the surface and extend its life.Waxing can make the Ski board control more convenient, enhance the speed of the board on the snow, and make you turn easier.In this way, the endurance of your skiing can be more lasting.And waxing can extend the life of a snowboard and can protect the bottom of the plate.The new Ski panels are generally waxed, but after slipping once or twice, the factory wax is gone.

At the end of the snow season, the board wax must be sealed, and the boots on the fixed device are loosen to let the tight spring be in a "rest" state.The snowboard should be stored in a dry place to prevent the metal material on the edge of the snowboard to rust.Do not store the snowboard in the basement of the yin tide, or it may become a humid storage room due to rain.Snowboards that have been stored in a humid place for a long time may be deformed by the corrosion of the wood heart of the board due to inhalation of the moisture. Many slippery boards are caused by water and water corrosion.The seal wax on the bottom of the plate not only prevent the moisture from entering the plate, but also long -term storage can gradually penetrate the wax into the plate, so that the wax on the snowboard is more difficult to fall off when skiing in the coming year.

2. How to wax the Ski board

1. Before you wax the skiing board, make sure your skiing board is clean and dry, so that the board to absorb wax is convenient.

2. Slowly apply the wax on the skiing plate evenly, and adjust the electric iron to the temperature that can remove the wax without smoking.

3. Unless your skiing place is extremely cold, you can usually use any ordinary wax.It is recommended to buy an iron that is specially used for waxed, or find a hole without holes.Because unless the wax on the iron is completely cleaned, the clothes cannot be used with the same electric iron.

4. Be careful not to put the iron for too long in one place, because it may melt all the Ski panels.After applying it evenly, let the skiing board be reduced to room temperature and then continue. This process takes at least half an hour.

5. Use a hard plastic ruler to scrape the wax.Avoid using iron ruler to scrape wax, because this may hurt the Ski board, and it should be scraped along the direction of the head/tail when scraping the wax.

6. Finally, use a hard -plastic brush or a Baijie cloth to polish the bottom of the board, please continue to grind along the direction of the head/tail.

3. How to maintain maintenance skiing board

1. After returning from skiing, you must take out the snowboard from the bag, and wipe the snow on the snowboard with a soft cotton cloth or strong adsorbent paper to dry it.

2. After drying, see if there is any damage.If the plate surface is damaged, the snowboard can be placed flat. Remove the excess substances on the plate surface, ignite the prepared rubber strips and hold it horizontally, and drip the melting rubber strip on the scars of the snowboard to cool.

3. After cooling, scrape the excess rubber strip with a steel scraper. If there is a large area of damage, it should be repaired by professionals.

4. After returning from skiing, you should also repair the steel edge of the snowboard. First, use a knife with a golden steel to grind the blade and horizontal blade of the damaged blade, and then use the snowboard corner (The adjustable angle, the ideal angle is 90 degrees) along the plate to polish the steel edge. Finally, the traces left on the steel blade with the polishing process with the golden steel stones.

5. Pay attention to waxing the snowboard. At home, you can directly apply liquid or paste wax to the snowboard, or directly use the block wax on the surface of the plate.In minutes, use the plate surface to polish and polish it, so that the wax can be better attached to the plate surface.Or find a professional to wax the Ski board.

Disclaimer: The above method stems from the index of the program system or the sharing of netizens. It is for your reference only and does not represent the research perspective of this website. It proves that it is valid. Please pay attention to the authenticity and authority of the source of the content of the content.Apply to delete & gt; & gt; error correction & gt; & gt;

1. What is the effect of Ski hats

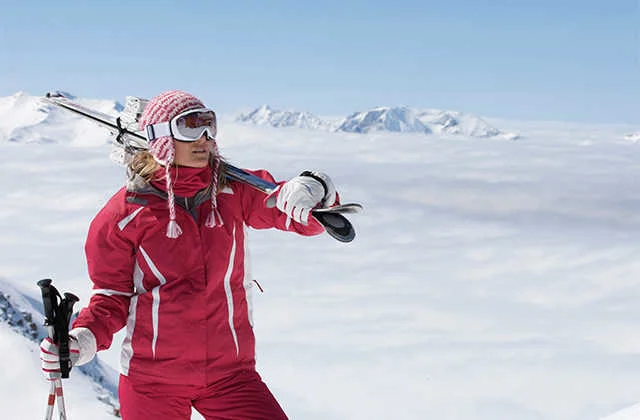
The head is a place to focus on when skiing, so you must be careful about the choice of Ski caps. Be sure to keep warm.Ski caps are the best conditions for the flexible velvet caps with good elasticity. The length is to cover the ears as the primary condition. It must be able to close the head and ears, so that even if strenuous exercise, it is not easy to loosen.It is best to choose a hood. It only reveals the front half of the face, which can prevent the cold wind from blowing the face, because the cold is hitting people during skiing. If it does not take any protection measures, it is easy to frostbite Skin, which is especially important for ladies.Many Ski caps add two slender design in their ears. This is the latest trend of hats. Young women bring this new Ski cap with this new Ski cap.But it is advisable to not affect the field of vision.

The role of Ski caps is to protect the head and ears, so when choosing the Ski cap, you must pay attention to simple and not affect the field of vision. Generally, it can be woven with fine fleece threads with good elasticity.If you feel that the stimulus of the cold wind splitting the face in the gliding is too large, you can choose the hood that only reveals the eyes, and then combined with the use of a full -blocking goggles, you can cover all the face.Stimulation.

Second, the weaving method of Ski cap

1. 78 stitches with 3.5 mm stick needles, 8 rows of weaving single threads, and evenly added to 102 stitches in the 9th line.

2. Weaving flower types with a 5.5 mm stick needle, a pattern of 17 stitches, a total of six.Among them, 16 needles (weaving twist), 1 needle.

3. When weaving to 11 lines, the first twist is screwed for the first time. Every 8 stitches in groups. Pay attention to the direction of the twist, which is changed.

4. Start twisting twisted twisted twist when weaving to 21 lines, and at the same time, the rejuvenation of the flower type is reduced.) Pay attention to the direction of the twist is different from the last time.

5. When weaving the last 4 stitches of line 26, do not weave first, and cross the 4 stitches with the 4 needles on the right (these 4 stitches above) to prepare for the next line of weaving.

6. Twisted twist in line 27, but this time, not all needles are twisted, 8 needle twist, 8 needle positive needles, and 8 stitches.

7. Line 28 -31 lines to reduce the needle. The specific method is to press the needle of the twisted edge of twisted twist on the neighboring needle that is not twisted, and each row is scattered.

8. Reduce 12 stitches and reduce 48 stitches in 4 lines.

9. Twisted twist in line 32, a group of 8 stitches, and the right side is pressed on the left side.

10. Line 33 -36 lines to reduce needles, each group of twists (pressed on it), the needle of the edge of the edge reduces the adjacent needle, diversify each row to reduce 6 stitches, and minus 24 stitches.

11. In line 37, every 2 stitches are 1 needle, reduce to 12 stitches, and tighten with the remaining line.

12. If you like it, make a woolen ball on the top of the hat.

Disclaimer: The above method stems from the index of the program system or the sharing of netizens. It is for your reference only and does not represent the research perspective of this website. It proves that it is valid. Please pay attention to the authenticity and authority of the source of the content of the content.Apply to delete & gt; & gt; error correction & gt; & gt;

1. What is a Ski stick

Ski sticks are tools we use to support forward, control balance, guide change, and support the body when skiing.Except for skiing, skiing and skiing in air skills, other items use Ski sticks, which is an indispensable Tool for Ski people to control the center of gravity.

2. What are the effects of skiing sticks

1. When the skiing board stands on the snow surface, the Ski stick can support the assistance to maintain a balance in time.

2. When the speed of the skiing board is not fast, it can be accelerated by struggling to support the Ski stick.

3. When the skiing board turns, the Ski stick is extended with the coordination of the Ski stick, and the point of the point is directed to promote the effective conversion of weight.

4. During the operation of mountain climbing and long -distance operation, skiing board plays a role in supporting and promoting.

5. When the skiing board stunts show, the Ski stick also dances with it to participate in the beauty of the beauty.

Third, how long the length of the Ski stick is appropriate

Generally, the length of the Ski stick is about 90-125cm. When skiing, it can be selected according to his height. The boy decreases 50cm with height, and the girl is reduced by 45cm with height, which is the applies to the length of the Ski stick.

When choosing, we should be based on light quality, not easy to discount, good balance, and suitable for our height.Generally, it is calculated from the snow wheel.You can pass through the leather bracelet.

Ski sticks are generally divided into alpine rods, off -road sticks and free Ski ballet sticks.Generally, the height of the elbow from the ground after the lower body is drooping as the length of the Ski stick.Beginners can choose a slightly longer Ski stick. After the technology is improved, choose shorter Ski sticks.

Fourth, how to use skiing sticks

1. Before or after the point of the point, you should control the hands holding the rod on the front and the outside of the waist.It is normal for the rod and the tip of the rod to fall behind the body, but you should also mention the front of the body as soon as possible.

2. The position of the point stick is usually on the inner snowboard of the turning, and the front side of the front part of the fixed device.

3. The power of the point stick comes from the forearm and the wrist. Do not use the arm of the arm, similar to the feeling of nailing with a hammer.

4. When preparing a stick, the tip of the stick can be obliquely forward, but at the moment of the point of the point, the stick and the snow surface are vertical, so as to use the effect of the upper force and receive the effect of the point stick.

5. After ordering the stick, the hand cannot be removed back and down, and the direction of the operation should be basically the same as the outer direction of the upper body.

5. precautions for skiing sticks

1. In order to make the cunning snow stick support and not easily separate from the hand, you can drill a hole at the top of the pole or directly fix the previous long ring -shaped strip.Living, this part is called a grip, the ring -shaped strip is called the leather.

2. In order to overcome the difficulties that are too deep, inconvenient, or even unavailable in deep snow, you can install a snow wheel at 7-10 cm at the bottom of the pole.Deep, ensure the role of the snow stick.

3. In order to make the Ski stick still support the hard snow surface, it is necessary to install a metal tip in the lower end.

4. The pole body of the Ski stick should be used with a solid wooden rod or alloy aluminum Tube. It is better to use hollow bamboo rods. The diameter of the rod is 15-30 mm.

Disclaimer: The above method stems from the index of the program system or the sharing of netizens. It is for your reference only and does not represent the research perspective of this website. It proves that it is valid. Please pay attention to the authenticity and authority of the source of the content of the content.Apply to delete & gt; & gt; error correction & gt; & gt;